We offer a wide range of services for that fresh look, or just maintenance or updates to keep your home functioning and safe. Regardless of the size of the job, we have a craftsman that can tackle it. We offer a wide range of services for that fresh look, or just maintenance or updates to keep your home functioning and safe. Regardless of the size of the job, we have a craftsman that can tackle it.
Tile / April 18, 2026
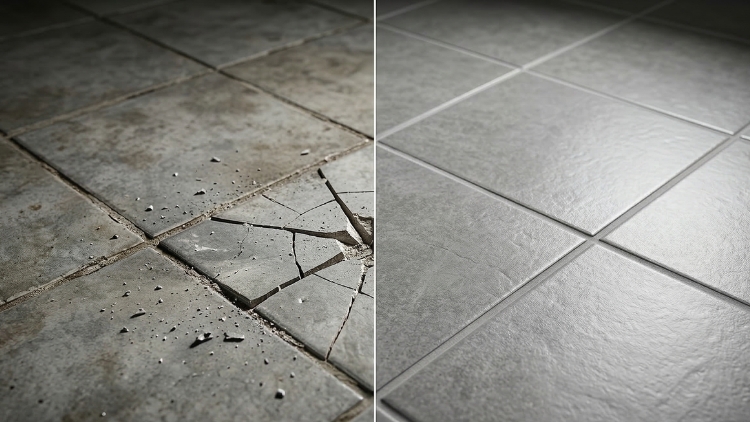
Cracked grout. A tile that shifts when you step on it. A chipped corner in the bathroom that seems to get worse every month. These are the signs that your floors or walls need professional attention — and waiting too long only makes things worse.
You might not notice tile damage right away. But over time, wear and tear takes a real toll. Water sneaks under loose tiles. Subfloors weaken. What starts as a small crack can become a structural issue. That’s why getting ahead of the problem matters.
Our professional tile replacement isn’t just about swapping one tile for another. It’s a careful, multi-step process. Experts assess the damage, protect surrounding tiles, and install new ones that sit flush, look great, and hold up for years. In this blog, we’ll walk you through exactly how our professionals at Handyman Connection in Edmonton handle worn and damaged tiles — from the first inspection to the final seal.
This is one of the most common questions homeowners ask. The cost to replace a single tile typically ranges from $50 to $200 or more, depending on several factors:
For areas with underlying subfloor damage, costs can increase significantly. The most reliable way to get an accurate number is our professional assessment. Our team at Handyman Connection in Edmonton offers project consultations so you know exactly what’s involved before any work begins.
Before anything is removed, our professionals inspects the full scope of the damage. This step matters more than most people realise.
A thorough assessment doesn’t just look at the surface. It checks for:
Once the inspection is complete, the area is prepped for work. Surrounding tiles are protected to prevent accidental damage, and the workspace is sealed off to contain dust and debris. This preparation stage is what separates a lasting result from a short-term patch. Skipping it is how problems get missed — and why the same tile ends up needing attention a year later.
Once the area has been inspected and protected, the next step is removing the grout around the damaged tile. Grout fills the spaces between tiles and holds them firmly in place. To remove the tile safely, this grout must be cut away first. Clearing the grout helps prevent damage to the surrounding tiles.
Our professionals use a grout saw or an oscillating multi-tool with a grout blade to do this work. These tools allow them to cut carefully along the grout lines. The goal is to remove only the grout without touching the healthy tiles nearby. This step requires patience and careful control.
Working too quickly or using the wrong tool can crack a nearby tile. If that happens, the repair becomes bigger and more expensive. Taking time during grout removal helps keep the rest of the tiles safe. Once the grout is fully cleared, the damaged tile can be removed properly.

Removing the old tile is a deliberate process. A hammer and chisel are used to break the damaged tile from the centre outward, reducing the risk of affecting surrounding tiles. For fragile or older installations, our professionals may use additional techniques:
Once broken into pieces, every fragment is removed carefully. Patience and precision here prevent accidental damage to neighbouring tiles — something that’s easy to avoid when the work is done by someone who knows what they’re doing.
After the damaged tile is removed, old adhesive or thinset mortar usually remains on the surface below. This leftover material must be cleared away before the new tile can be installed. If it is left in place, the new tile may sit unevenly or fail to bond properly. Preparing the surface carefully helps ensure the repair lasts.
Our professionals use tools such as a hammer, chisel, or tile scraper to remove the old adhesive. The goal is to bring the surface back down to the base layer. Once the thinset is removed, the area is checked to make sure it is flat and smooth. A level surface allows the new tile to sit evenly with the surrounding tiles.
Next, all dust and debris are cleaned away. A vacuum is often used to remove small particles that could affect the bond. If moisture damage is found underneath, it is repaired at this stage before new materials are added. A clean and level surface is the key to a strong and lasting tile installation.
Once the surface is clean and ready, the new tile can be installed. This step requires careful planning and the right adhesive. Different areas of the home need different bonding materials. Choosing the correct product helps ensure the tile stays secure for years.
Our professionals consider the location and conditions before selecting an adhesive. Areas exposed to water or heavy foot traffic need stronger bonding materials. Walls in dry rooms may use a different type of adhesive. The goal is always to create a strong and lasting bond.
Our professionals choose based on where the tile is going:
The thinset is spread with a notched trowel, which creates ridges for even contact. The tile is then carefully placed, pressed into position, and levelled to match the height of surrounding tiles. It needs to cure for about 24 hours before the final step.
After the thinset has fully cured, grout is applied to fill the spaces between the tiles. Choosing a grout colour that matches the existing grout is an important detail. If the colour does not match, the repair can stand out and look uneven. A proper match helps the repaired area blend in with the rest of the floor or wall.
The grout is pressed into the joints using a grout float. This tool helps push the grout firmly into the gaps between tiles. As the grout begins to set, the surface is wiped with a damp sponge to remove extra material. Once it dries, any remaining haze on the tiles is gently polished away.
The final step is sealing the grout. A quality grout sealant helps protect the joints from water, stains, and daily wear. This is especially important in Edmonton, where seasonal temperature changes can stress tile surfaces. Sealing helps keep the grout strong and looking clean for years.
Our professional tile repair involves more than simply replacing a damaged tile. Small details during installation make a big difference in how the final result looks and how long it lasts. Experienced installers follow careful techniques that help the repair blend in with the surrounding tiles. These extra steps also help prevent future problems.
A few extra techniques separate our professional results from an average one:
Tile installations in Edmonton must handle big changes in temperature throughout the year. Winters are very cold, while summers can be warm. These shifts cause buildings to expand and contract over time. When this happens, grout lines and tile bonds can come under pressure.
Some areas of the home feel this stress more than others. Entryways often face heavy traffic along with moisture from snow and rain. Tiles near exterior walls also deal with stronger temperature changes. Rooms with uneven heating may see more movement, which can lead to early wear or cracked grout.
Bathrooms bring another challenge: humidity. In older Edmonton homes, ventilation may not always be strong enough to remove moisture quickly. This extra moisture can weaken grout and allow water to slip beneath the tiles. Our professionals account for these conditions by choosing the right adhesives, grout, and installation methods.
Yes. With the right extraction technique, only the damaged tile needs to come out. Surrounding tiles stay protected throughout the process.
Our professionals can often source older or discontinued styles through specialty suppliers. If an exact match isn’t possible, colour-matched epoxy filler can be used for smaller chips or cracks.
Tiles that sound hollow when tapped, shift underfoot, or have visible moisture nearby are signs that the subfloor may be affected. Our professional inspection will confirm whether it needs to be addressed before new tiles go in.
Thinset typically needs about 24 hours to cure, and grout takes 24 to 72 hours depending on the product. Foot traffic and cleaning should wait until everything has fully set.
Worn or damaged tiles aren’t just an eyesore — they can point to bigger problems hiding underneath. Ignoring these issues can lead to even more costly repairs later. That’s why taking action now can save you time, money, and stress in the future. At Handyman Connection in Edmonton, we understand that every detail matters when it comes to tile work.
Our experienced craftsmen approach each project with care and precision, ensuring that your floors are not only fixed but also built to last. Using industry-best tools, premium adhesives, and techniques tailored to Edmonton’s unique climate, we deliver results that stand up to the test of time. From assessing the problem to applying the final seal, every step is done with your home’s safety and appearance in mind.
Don’t wait for the problem to grow. When your floors need attention, trust a team that puts quality first. Request an estimate today and take the first step towards a lasting solution. Together, we’ll make your space not just functional, but beautiful and dependable for years to come. At Handyman Connection, we’re ready to help bring your vision for your home to life.

#102-4990 92 Ave NW
Edmonton, AB T6B 2V4

© Handyman Connection 2026 | Privacy Policy

 780-414-6152