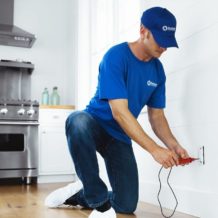
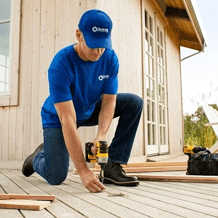
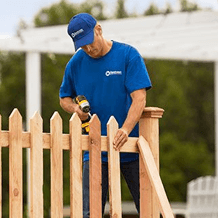
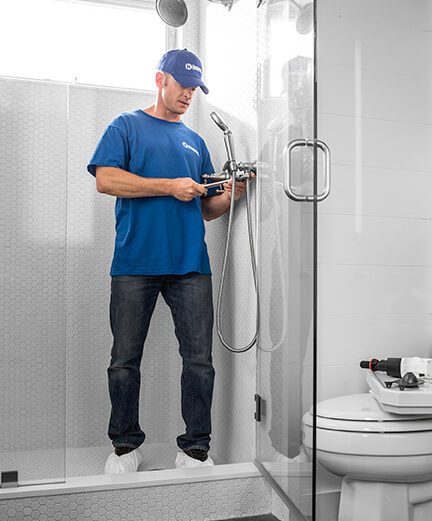
We offer a wide range of services for that fresh look, or just maintenance or updates to keep your home functioning and safe. Regardless of the size of the job, we have a craftsman that can tackle it. We offer a wide range of services for that fresh look, or just maintenance or updates to keep your home functioning and safe. Regardless of the size of the job, we have a craftsman that can tackle it.
Drywall / June 8, 2026
When you notice damage to your drywall, it can be tempting to grab some supplies and try fixing it yourself. However, achieving a seamless, flawless finish requires more skill and expertise than most people realize. Professionals follow a careful process to ensure the repair blends perfectly with the rest of the wall.
First, they clean the damaged area and ensure there’s solid backing support to hold the repair in place. Then, they apply multiple thin layers of joint compound to gradually fill in the damage, letting each coat dry properly before moving on. Once the surface is smooth, they carefully sand it down until it’s perfectly flat and ready for painting. While quick DIY patches might seem like a cheap solution, they often lead to uneven results or repairs that don’t last.
That’s why it’s worth hiring experts like Handyman Connection in Edmonton, so you can rest assured the job will be done right without costly mistakes. We pride ourselves on delivering durable, high-quality repairs that look amazing and add value to your home. Keep reading this blog to learn more about the professional process for repairing holes in drywall and why it’s the best option for a long-term solution.
The most common mistakes include using too much joint compound, skipping the necessary sanding process, and failing to use sturdy backing support for larger gaps. You might also see people applying paint before the patch is completely dry, which ruins the finish. Our professionals at Handyman Connection avoid these errors by carefully preparing the surface and applying thin, even layers of material. We ensure every single step is done with precision so the wall looks flawless and structurally sound.
You will often notice that rushed jobs leave ugly bumps or visible seams on the wall. This happens when someone tries to cover a large gap with just a thick layer of spackle. Our team takes the time to let each layer dry properly, which stops the material from shrinking and cracking over time.
You can save yourself a lot of frustration by letting experts handle the job from the beginning. We bring the right tools and materials to ensure the patch blends perfectly with the rest of your room. By avoiding these common mistakes, we leave your house looking clean and totally refreshed.
Before adding any materials, our technicians carefully prepare the damaged wall. You need a clean, solid edge to make a patch stick properly and securely. We remove damaged, loose, or wet material around the gap to create a stable foundation for the repair.
This step ensures that the new materials bond securely to the existing structure without peeling later. You cannot just slap a patch over crumbling paper edges and expect it to hold up. Our professionals take the time to square off the edges of the gap, making it much easier to fit a new piece inside.
We always make sure the workspace is clean before we move on to the next phase of the repair. You will appreciate how carefully we prep the area to prevent dust from spreading everywhere. Here’s what we do to clear the debris:
When dealing with bigger damage, like a heavy doorknob punch, a simple patch is never enough. You need solid backing support to keep the new piece from falling through the wall. Our team at Handyman Connection installs a strong wood backing behind the opening to secure the new material firmly in place.
We drive screws through the intact wall and into the wood strips to hold them firmly. This creates a strong, reliable frame for the new replacement piece to rest against. You get a much stronger wall because the wood prevents any future movement or flexing when pressure is applied.
Our professionals always make sure this backing is flush and secure before moving forward. You never have to worry about the patch sinking inward over time. We take pride in building a repair that is just as strong as the original wall structure.

Applying the patch correctly depends entirely on the specific size of the damage. You will see our experts use different techniques to match the exact problem at hand. We use simple spackle for tiny dents, while medium gaps require self-adhesive mesh patches for extra reinforcement.
For major damage, we cut a brand new piece of material to fit perfectly into the open space. You want the patch to sit flush with the existing wall so it does not create an ugly bulge. Our technicians measure the opening carefully and cut the replacement piece with exact precision.
We secure the new piece tightly to the wood backing we installed earlier. You can trust that our methods will hold the patch securely in place for years to come. How do you choose the right patch?
Once the patch is tightly in place, we move on to the mudding and taping phase. You cannot just slap on a thick layer of joint compound and call the job finished. Our technicians apply multiple thin coats of compound over the special joint tape to build strength.
We let each individual layer dry completely before adding the next one to the wall. This careful process ensures maximum strength and prevents the compound from cracking as it shrinks. You will notice that our professionals use a wide putty knife to smooth out the compound beautifully.
This spreading technique helps the repair blend naturally and softly into the rest of the room. You never want to see harsh lines where the tape was placed. We build the layers up gradually to create a gentle, unnoticeable slope that hides the seams completely.
To make the repair truly invisible, our team uses a highly effective technique called feathering. You want the edges of the patch to disappear smoothly into the existing wall texture. We apply the compound in wide, thin layers that fan out far from the centre of the patch.
This gradual thinning makes it impossible to feel where the patch ends and the old wall begins. You will be amazed at how this simple trick tricks the eye into seeing a perfectly flat surface. Our team has years of practice mastering this specific spreading motion.
We take our time during this phase because it dictates how the final painted wall will look. You can rely on our skilled hands to create a flawless transition every single time.
Sanding is the absolute secret to achieving a perfectly flat and beautiful surface. You must wait until the final coat of compound is bone dry before starting this dusty step. Our professionals use fine-grit sandpaper to gently smooth away any tiny ridges, lines, or bumps.
We take our time to make sure the repaired area feels as smooth as glass to the touch. You do not want any rough patches showing through your expensive interior paint. Our team uses specialized sanding blocks that give us total control over the pressure applied to the wall.
We always clean up after the sanding process is completely finished. You will not have to worry about fine dust covering your furniture or floors. Here’s how we create a smooth finish:
The final step is priming and painting the repaired section to make it look brand new. You should never apply paint directly over bare joint compound, as it will look terrible. Our team applies a high-quality primer first to seal the patch and protect the surface.
This stops the porous compound from soaking up the paint and looking dull and faded. Once the primer is completely dry, we paint the area to match your surrounding colour perfectly. You will be thrilled to see how the fresh paint brings the whole room back to life.
We blend the paint carefully so that nobody can ever tell a hole was there. You can finally enjoy a beautiful, uninterrupted wall without any ugly distractions. This leaves your Edmonton home looking incredibly fresh, clean, and perfectly maintained.
Living in Edmonton brings unique and specific challenges for your beautiful home. You experience freezing cold winters and fluctuating humidity levels throughout the entire year. These constant, extreme weather changes cause the wood framing inside your house to expand and contract heavily.
This natural house movement often leads to ugly seam cracks and nails popping out of the walls. Our professionals know exactly how to handle these specific local climate issues effectively. We use techniques and flexible materials that stand up nicely to the extreme temperature shifts in Alberta.
By understanding exactly how local weather affects your home, we provide repairs that truly last. You can rest easy knowing our fixes will survive through every harsh winter and humid summer season. We always tailor our repair strategies to fit the unique environment of the Edmonton area.
At Handyman Connection, we use proven techniques to ensure your drywall looks great and stays strong for years. One popular method is creating “drywall sandwiches,” where layers of drywall are carefully attached to add strength and smoothness. This approach is perfect for fixing large holes or reinforcing weak sections of a wall, ensuring a seamless result every time.
Texturing is another technique we frequently use to match the look of your existing walls. We apply various finishes, such as orange peel, knockdown, or smooth, depending on your preference or the original design. These textures not only enhance the appearance of your walls but can also help hide smaller imperfections for a flawless finish.
Nail pop repairs are essential for keeping your walls safe and looking tidy. Nail pops happen when nails push through the drywall, often caused by shifts in the home’s structure or seasonal temperature changes. We fix these by securing the drywall with screws, removing the popped nails, and patching the surface to blend perfectly with the surrounding area.
Joint compound usually takes about 24 hours to dry. The exact time depends on how warm or humid the room is. If the air is damp, it may take longer to fully dry. We always wait until it is completely dry before sanding. This helps prevent cracks and keeps the surface smooth.
Yes, we can match most wall textures in your home. Our team uses special tools to copy the pattern. We take our time to blend the new patch with the old surface. This helps the repair look natural and clean. Most people will not even notice where the repair was done.
Popped nails happen when the wood behind your wall shifts. This can be caused by changes in temperature and moisture. When the wood moves, it pushes the nail out. This creates a small bump on your wall. We fix this by removing the nail and using strong screws to hold it in place.
You do not always need to paint the whole wall. If you have the same paint colour, we can touch up the spot. This helps the repair blend in with the rest of the wall. Sometimes, older paint may not match perfectly due to fading. In that case, painting the full wall may give a better result.
Backing support is not always needed for every repair. It is mainly used for larger holes in the wall. Without support, the patch may not stay in place. We check the size and location of the damage first. Then we choose the safest and strongest way to fix it.
Keeping your home beautiful starts with solid, flawless walls in every single room. You deserve a comfortable living space that feels clean, safe, and expertly maintained. Attempting to tackle large wall repairs on your own may seem like a quick fix, but it can often lead to uneven patches or unsightly cracks that will require redoing later. That’s why turning to our professional drywall service is the smart choice for lasting results.
At Handyman Connection in Edmonton, we make your walls look as good as new. We take care of every step of the process, from filling gaps to smoothing surfaces, ensuring each patch is strong, seamless, and invisible. The dusty mess and hard work? That’s our responsibility. All you need to do is sit back and enjoy the results.
Your home should feel like your sanctuary, and keeping it in top condition is our priority. We treat your property with the care and respect it deserves, from the moment we arrive until the job is done. Don’t settle for walls that look anything less than perfect. Contact Handyman Connection today to request an estimate and discover how we can restore your walls to their original glory. It’s time to love your home again.
#102-4990 92 Ave NW
Edmonton, AB T6B 2V4

© Handyman Connection 2026 | Privacy Policy
 780-414-6152