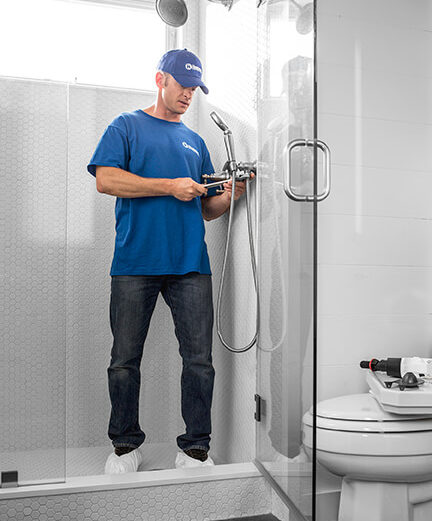
We offer a wide range of services for that fresh look, or just maintenance or updates to keep your home functioning and safe. Regardless of the size of the job, we have a craftsman that can tackle it. We offer a wide range of services for that fresh look, or just maintenance or updates to keep your home functioning and safe. Regardless of the size of the job, we have a craftsman that can tackle it.
Painting / April 15, 2026
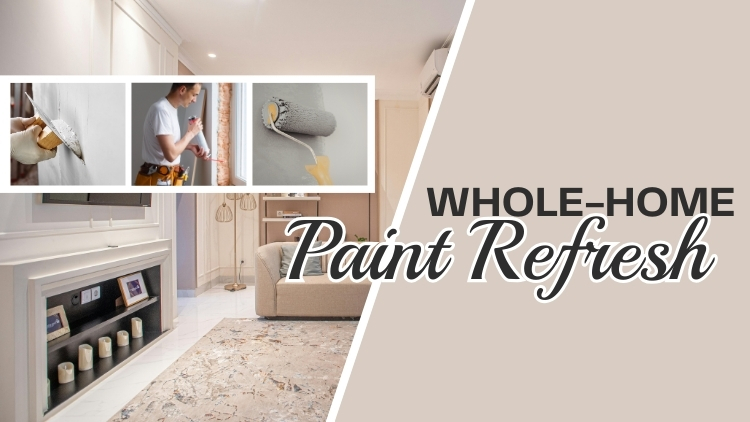
A whole-home paint refresh starts long before a single drop of colour hits the wall. The real secret to a flawless finish comes down to three things: solid wall repairs, proper caulking, and clean, precise lines. Skip any one of these steps, and you’ll end up with peeling edges, visible cracks, or bleed lines that make the whole job look rushed.
You’ve probably noticed how a freshly finished room just feels different: walls that look tight, trim that looks sharp, colours that look rich and even. That result doesn’t happen by accident. It takes careful preparation, the right materials, and skilled hands to pull it off consistently across an entire home.
At Handyman Connection in Ottawa, our craftsmen follow a structured process for every whole-home refresh. Each step is handled with care — from clearing and cleaning the space to applying the final coat with smooth, even coverage. In this blog, we’ll walk you through exactly how a professional whole-home paint refresh is done, including wall repairs, caulking, and the techniques that create those crisp, clean lines.
The best finish to hide wall imperfections is an eggshell or satin finish. These mid-sheen options reflect just enough light to make a surface look smooth, without the high shine that draws attention to bumps, patches, or uneven texture.
Flat and matte finishes absorb light, which sounds helpful, but they tend to highlight texture differences between repaired and unrepaired areas, especially once the light shifts throughout the day. High-gloss finishes do the opposite. They reflect so much light that every flaw becomes obvious.
Eggshell works well in living rooms, bedrooms, and hallways. Satin is a slightly harder, more washable option that holds up better in kitchens and bathrooms. In either case, the finish only performs as well as the surface underneath. That’s why proper prep and wall repairs come first — always.
Every professional whole-home refresh starts with careful preparation. The space must be cleared, and surfaces must be ready before any paint goes on. Without proper prep, even the best paint will not stick well or look smooth. Taking time at this stage makes a big difference in the final result.
At Handyman Connection, we begin by clearing the space. Furniture is moved away from the walls so there is room to work safely. Outlet covers are removed, and floors are protected with strong canvas drop cloths. This keeps the area clean and prevents damage from drips or dust.
Next, we clean every surface. Walls are wiped down to remove dust, grease, and everyday grime. Kitchens and bathrooms get extra care because cooking residue and moisture can stop paint from sticking properly. We also sand rough patches and glossy areas with fine sandpaper to create a smooth base.
This preparation step sets the tone for everything that follows. A clean and smooth wall helps the paint go on evenly. It improves colour consistency and often reduces the number of coats needed. Good prep work leads to a cleaner, longer-lasting finish.

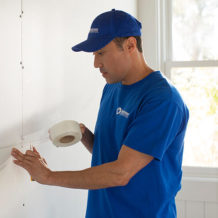
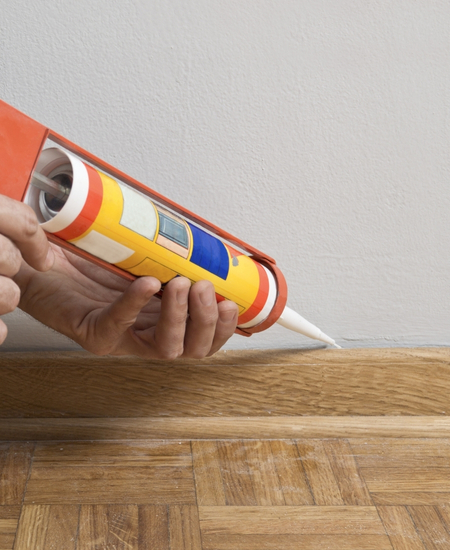
Once surfaces are prepped, it’s time to deal with every crack, dent, hole, and gap. This is where the difference between a professional result and an amateur one becomes most obvious.
Our process for wall repairs and caulking includes:
Skipping caulk is one of the most common reasons a refresh looks unfinished, even when the colour itself looks great. These small gaps catch the eye and they’re easy to miss when you’re working quickly.
Clean lines are what separate an average job from a truly sharp one. Getting them right takes patience and the right technique — not just a steady hand.
Here’s how our craftsmen create those tight, professional edges:
Every one of these details matters. Done right, the lines look sharp and deliberate. Done wrong, they look messy, no matter how good the colour itself looks.
With prep complete, repairs done, caulk dry, and edges cut in, the main application can begin. This is where technique makes a real difference in the final result.
Our craftsmen follow a consistent method for applying coating:
Each coat is allowed to dry fully before the next one goes on. Rushing this step leads to streaks, texture bubbles, and uneven sheen — problems that require sanding and recoating to fix.
Ottawa homeowners face one of the toughest climates in Canada. Winters are extremely cold, and summers can be hot and humid. During spring and fall, freeze-thaw cycles cause materials to expand and shrink. Over time, these changes can wear down interior surfaces.
Because of this, many homes in Ottawa develop cracks near windows and door frames. Wood expands and contracts with the seasons, which can cause small gaps to form. Peeling paint often appears near exterior walls where moisture builds up behind the surface. Baseboards and trim can also shift, causing caulk to pull loose and leave visible gaps.
A whole-home refresh in Ottawa must take these conditions into account. Flexible caulk is used so it can move without cracking. The right primer helps protect high-moisture areas from peeling and damage. Our team at Handyman Connection in Ottawa chooses products built for changing climates, ensuring long-lasting results for your home.
The timeline depends on the size of the home and the extent of repairs needed. Most whole-home projects take between three and seven days when handled by a professional crew. Larger homes or those with significant wall damage may take longer.
Not always, but it’s strongly recommended when making a dramatic colour change — for example, going from a deep dark colour to a light one, or vice versa. Priming also helps when covering stains, sealing patches, or refreshing surfaces that haven’t been coated in many years.
Most products feel dry to the touch within a few hours, but the full cure time is typically 24 to 72 hours. It’s best to wait at least 24 hours before moving furniture against fresh walls to avoid scuffs or transfer marks.
Most interior surfaces benefit from a refresh every five to ten years, depending on the level of use, the quality of the previous application, and how well the surface has held up. High-traffic areas like hallways and kitchens often need attention sooner.
In some cases, a targeted prime-and-coat approach can address specific stained areas without refinishing the entire wall. However, achieving a perfect match on older or faded surfaces can be difficult. A full wall coat often produces the most consistent, seamless result.
Yes. Even narrow gaps along trim or baseboards are noticeable once fresh colour goes on, because the contrast between wall colour and shadow inside the gap becomes more pronounced. Caulking these areas before application is always worth the extra time.
Refreshing your home can make a big difference in how it looks and feels, but it’s important to get every step just right. Skipping proper preparation or rushing through repairs can lead to problems down the road. That’s why attention to detail is so important. From fixing imperfections to applying caulking and a flawless finish, each step helps create a polished, long-lasting result.
At Handyman Connection in Ottawa, our team takes pride in doing the job right. We bring expertise, quality materials, and a focus on craftsmanship to every project we handle. Whether you’re tackling a single room or refreshing your entire home, we ensure the outcome is something you’ll love for years to come.
Don’t settle for anything less than high-quality results. Contact Handyman Connection in Ottawa today to request your estimate and take the first step toward a home that feels brand new. We’re here to help every step of the way!
1550B Chatelain Ave
Ottawa, ON K1Z 8B5

© Handyman Connection 2026 | Privacy Policy
 613-723-5021