We offer a wide range of services for that fresh look, or just maintenance or updates to keep your home functioning and safe. Regardless of the size of the job, we have a craftsman that can tackle it. We offer a wide range of services for that fresh look, or just maintenance or updates to keep your home functioning and safe. Regardless of the size of the job, we have a craftsman that can tackle it.
Drywall / January 27, 2026
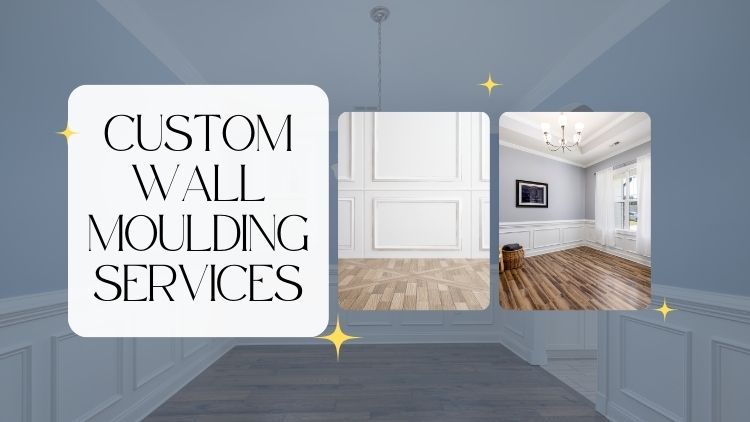
Creating a feature wall with wainscoting and picture-frame moulding designs is one of the simplest ways to give a room a custom, high-end look. You notice the impact right away—clean lines, raised trim, smooth shapes, and balanced spacing that turns a plain surface into something special. When you want a wall that feels finished and designed with purpose, wainscoting feature wall installation gives you that polished, timeless style.
You might wonder how experts make a project like this look so clean. The answer is in the planning, the layout, the cutting, and the finishing. Each step needs care and accuracy, which is why we always follow a clear process when we handle wainscoting and picture-frame moulding feature wall installation for homeowners.
When our team at Handyman Connection in Regina creates these custom wall moulding services, we focus on precision, clean lines, and long-lasting results. The rest of this piece will walk you through how professionals complete each stage so you know exactly what happens from start to finish… and in this blog, you’ll learn how every step of the installation comes together.
A great feature wall always starts with careful preparation. This step sets the foundation for everything that happens next. When we begin any wainscoting feature wall installation, we look closely at the area to make sure the surface is ready for trim. Even small bumps, uneven paint, or rough spots can affect how the moulding sits.
We usually start with a clean, smooth surface. If the wall needs a fresh coat of paint before the trim goes up, this is when it happens. Painting first creates a base colour that will show through behind the moulding. Many homeowners choose white, soft grey, navy, or deep green because these colours add contrast and help the trim stand out. A semi-gloss or satin finish works well when you want a durable surface that looks polished.
Once the paint is dry, we shift our focus to layout. This is where accuracy matters. We measure the height of the feature area and use a laser level to mark straight lines. This tool helps us create clean horizontal guides for the top of the wainscoting or the upper edge of the picture-frame moulding designs.
These layout steps help us avoid uneven shapes, gaps, or crooked lines. When the plan is precise, the finished feature wall always looks cleaner and more professional.
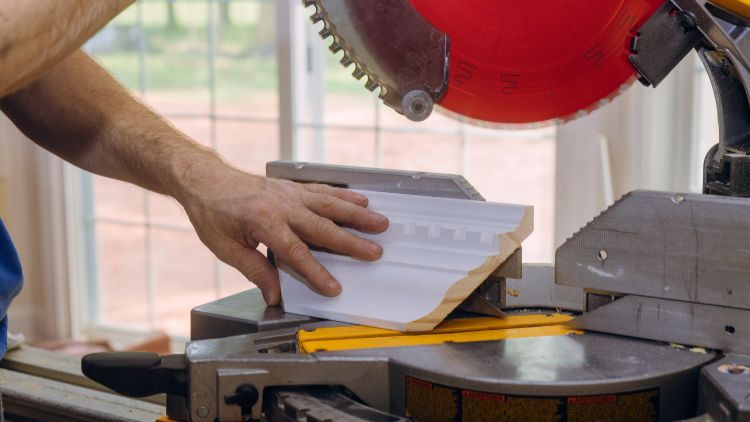
Once the layout is complete, the trim pieces must be cut with the right angles and lengths. Picture-frame moulding designs rely on perfect corners, and even a small mistake will stand out once the pieces are joined. That’s why professionals use a high-quality mitre saw to create exact 45-degree angles for every corner.
We also prime the moulding before it goes onto the wall. Priming first allows the final coat of paint to go on smoothly and evenly. It also prevents the wood from absorbing paint in different ways, which can leave blotchy spots.
There are two ways for pros to assemble the picture-frame shapes:
This method is useful for walls with angled spaces or unique layouts. We:
This method provides the highest accuracy for picture-frame moulding designs. We build full rectangles on a workbench first using:
Once dry, each frame becomes a single unit. We lift it into place and attach it directly along the guideline marks. This creates sharper lines and very clean corners.
Both methods can work beautifully, but the choice depends on the room’s shape and the feature design.
The next step in a wainscoting feature wall installation is attaching the moulding permanently. This is where the wall begins to come to life. Once the adhesive is applied, we line up each piece with the pencil or laser level marks. Pressing the moulding firmly into place helps the adhesive bond. The brad nailer keeps each piece tight and secure.
We also follow the layout closely to keep spacing even. Picture-frame moulding designs need symmetry to look right. If you see frames that are different sizes or slightly crooked, it affects the whole feature wall. That’s why pros move slowly and make sure the lines look perfect from every angle. If there are windows, doors, or outlets in the way, we adjust the layout so the shapes fit naturally around them.
Sometimes a window sill or a cabinet height sets the upper line of the feature wall. Other times, the homeowner wants a taller look or a shorter, more classic wainscoting height. Since these are custom wall moulding services, the final style always depends on the overall design of the room.
Finishing the Trim for a Clean, Polished Look
Once everything is attached, the next step is finishing. These small details make a huge difference in how the feature wall turns out. Even perfectly cut corners leave tiny nail holes or seams that need filling.
Caulking is especially important because it softens any hard edges and hides minor imperfections. This step brings the whole wainscoting feature wall installation together. A thin bead of paintable caulk can turn a good project into a great project.
After sanding and cleaning any dust, we paint the trim to match the base colour. When the trim and the surface share the same colour, the design looks unified, timeless, and custom-built. At this point, the feature wall is complete, and the room looks more elegant and intentional.
There are many ways to style moulding, and your choices help create the mood of the room. Some designs feel classic. Others look modern or bold. Professionals help you find the right shape and spacing so the finished look fits your home.
Here are some common design options:
Professionals create a plan that matches your style, the size of the room, and the way the shapes will line up with doors, windows, or furniture.
Every step, from cutting mitres to spacing frames, needs accuracy. When our team at Handyman Connection in Regina handles these projects, we focus on clean results that hold up over time. Feature walls are meant to look sharp from every angle, and small details matter.
By choosing professional custom wall moulding services, you get:
And most importantly, you get a feature wall that improves the room, adds value, and looks good for years.
If you’re ready to add character to a room, wainscoting feature wall installation is one of the best ways to do it. Our team at Handyman Connection in Regina creates picture-frame moulding designs, offers custom wall moulding services, and handles every detail with care.
To learn more about the process or request an estimate to learn more, reach out today. Your feature wall can start anytime.
1440 Fleury Street
Regina, SK S4N 5B1

© Handyman Connection 2026 | Privacy Policy
 306-352-9900