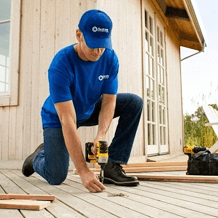
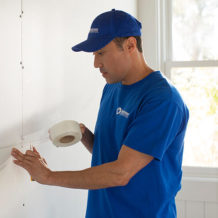
We offer a wide range of services for that fresh look, or just maintenance or updates to keep your home functioning and safe. Regardless of the size of the job, we have a craftsman that can tackle it. We offer a wide range of services for that fresh look, or just maintenance or updates to keep your home functioning and safe. Regardless of the size of the job, we have a craftsman that can tackle it.
Bathroom / April 22, 2026

Your bathroom floor takes a beating every single day. Moisture, foot traffic, and time all take their toll. When tiles start to crack, grout turns grey and crumbly, or the floor just looks worn out, a proper tile replacement with waterproofing is the most effective fix.
Refreshing your bathroom floor starts with removing the old tile, preparing the subfloor, installing a waterproof barrier, and laying new tile with quality grout and sealing. Each step matters. Skip one, and you risk cracked tiles, hidden moisture damage, or mould growing beneath the surface. Done right, a bathroom floor tile replacement gives you a clean, durable surface that lasts for years.
In this blog, we’ll walk you through exactly how professionals at Handyman Connection in Ottawa approach a bathroom floor tile replacement with proper waterproofing — from demolition all the way to the final seal.
This is one of the most common questions homeowners ask. The short answer: it’s not recommended. Laying new tile over old tile might seem like a quick fix, but it creates problems down the line.
Old tiles may have cracks, uneven surfaces, or hidden moisture underneath. Covering them traps existing damage and adds height to the floor, which can affect door clearance and transitions to other rooms. More importantly, the waterproofing layer cannot be properly applied without a clean, solid base.
The professional approach always starts fresh. Removing the old tiles allows for a thorough inspection of the subfloor, proper waterproofing, and a secure new installation that performs the way it should.
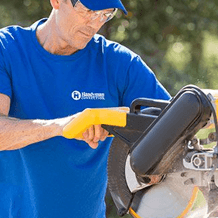
The first step is clearing out the old floor entirely. Our team removes every tile carefully, checking for water damage, soft spots, or structural issues in the subfloor as they go.
This step is more important than it looks. Hidden moisture damage under old tiles is common, especially in bathrooms that have been in use for years. Catching it at this stage prevents far bigger problems later, like rot or mould spreading beneath the new floor.
Here is what the preparation stage includes:
A clean, sound subfloor is the foundation everything else depends on.
After the old flooring is removed, the subfloor must be made perfectly flat. Even small bumps or dips can cause tiles to crack or shift later. A smooth base is key to a long-lasting tile floor. Taking time at this stage prevents future problems.
Our craftsmen use self-levelling compound or cement board to create a solid surface. Self-levelling compound fills in low spots and smooths out uneven areas. Cement board adds strength and resists moisture, which is important in bathrooms. Both options help provide a stable foundation.
This step is critical for the final result. A level surface keeps tiles flat and grout lines straight. It also helps prevent cracks and loose tiles down the road. Skipping this step is one of the main reasons tile floors fail too soon.

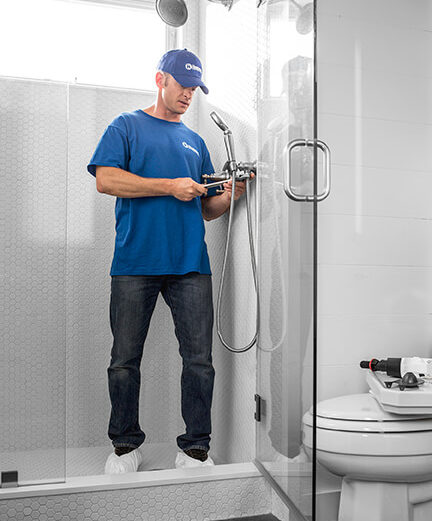
Proper waterproofing is what separates a long-lasting tile floor from one that causes problems a few years down the road. Bathrooms are constantly exposed to water, steam, and humidity. Without a solid moisture barrier, water finds its way into the subfloor and walls, leading to rot, mould, and costly repairs.
There are several approaches our team uses depending on the project:
Every corner and seam gets special attention. These are the spots where water most often finds a way through.
Once waterproofing is complete, the new tiles are installed. Porcelain and ceramic are the most common choices for bathroom floors. Both are water-resistant, strong, and available in many colours and styles. These materials work well in spaces where moisture is present.
Porcelain is denser and nearly waterproof, which makes it a great option for high-moisture areas. Ceramic is also durable and often more budget-friendly. No matter which material you choose, proper installation is what makes the biggest difference. A well-installed floor will last longer and look better over time.
Our team lays each tile in a straight and consistent pattern. Spacing is kept even so grout lines look clean and uniform. Tiles are carefully cut around edges and fixtures for a tight fit. Each piece is pressed firmly into place to create a strong and secure bond.
Grouting fills the gaps between tiles and locks everything together. High-quality grout applied properly resists staining, holds up under regular cleaning, and keeps moisture from working its way beneath the tiles.
Once the grout has cured, a sealer goes over the entire surface. The sealer adds an extra layer of protection against moisture and stains, making the floor easier to clean and extending its lifespan.
This final step includes:
A properly grouted and sealed floor is low-maintenance and highly durable.

Ottawa homes face big temperature changes all year long. Winters are very cold, and summers can be hot and humid. These shifts cause building materials to expand and shrink. Over time, this movement can put stress on tile floors and cause cracks.
Proper waterproofing helps protect tile from these seasonal changes. Flexible waterproof membranes allow the floor to move without breaking. Perimeter foam and strong tile adhesives also help absorb stress and prevent separation. These materials work together to keep the floor stable through freeze-thaw cycles.
Homes in Ottawa can also deal with humidity and groundwater issues. This makes moisture barriers even more important, especially in basements and bathrooms. When waterproofing is done correctly from the start, the floor stays strong and secure. Getting it right the first time means your tile holds up through every season.
Most projects are completed within two to three days, depending on the size of the floor and the extent of any subfloor repairs needed. Our team works efficiently to minimize disruption.
Common signs include soft or spongy spots when you walk across the floor, tiles that feel loose or hollow when tapped, or a persistent musty odour. Our team inspects the subfloor thoroughly during the demolition phase.
Porcelain is widely considered the top choice because of its density and low water absorption rate. Ceramic is also a solid option and tends to be more budget-friendly. Both perform well in wet environments when installed correctly.
Grout sealer should be reapplied every one to two years, depending on usage. Regular sealing keeps grout looking clean and prevents moisture from penetrating the joints.
In most cases, proper waterproofing requires access to the subfloor. Applying waterproofing on top of existing tile is not effective and is not a recommended approach.
Both are available with textured or matte finishes that improve traction. Smaller tiles and mosaic patterns also increase grip because they create more grout lines across the surface. Our team can help you choose a tile with the right finish for safety and style.
Replacing your bathroom floor tile is more than a simple update. It protects your home from moisture and helps prevent costly damage in the future. A properly installed tile floor can handle daily use, water spills, and Ottawa’s changing seasons. When each step is done the right way, the result is a surface that looks great and lasts for years.
From removing old tiles to preparing the subfloor, every stage matters. Waterproofing keeps moisture from seeping below the surface. Careful tile placement ensures straight lines and even spacing. Grouting and sealing lock everything in place and protect against stains and mould. When one step is rushed or skipped, problems can show up later.
At Handyman Connection in Ottawa, our craftsmen take pride in doing the job properly from start to finish. We focus on strong preparation, quality materials, and precise installation. You get a clean, waterproofed, professionally tiled floor without the stress of managing it yourself. If your bathroom floor is cracked, worn, or outdated, now is the time to act. Request an estimate today, and let’s talk about how we can give your space a fresh start with a floor built to last.
1550B Chatelain Ave
Ottawa, ON K1Z 8B5

© Handyman Connection 2026 | Privacy Policy
 613-723-5021