We offer a wide range of services for that fresh look, or just maintenance or updates to keep your home functioning and safe. Regardless of the size of the job, we have a craftsman that can tackle it. We offer a wide range of services for that fresh look, or just maintenance or updates to keep your home functioning and safe. Regardless of the size of the job, we have a craftsman that can tackle it.
Drywall / December 12, 2025

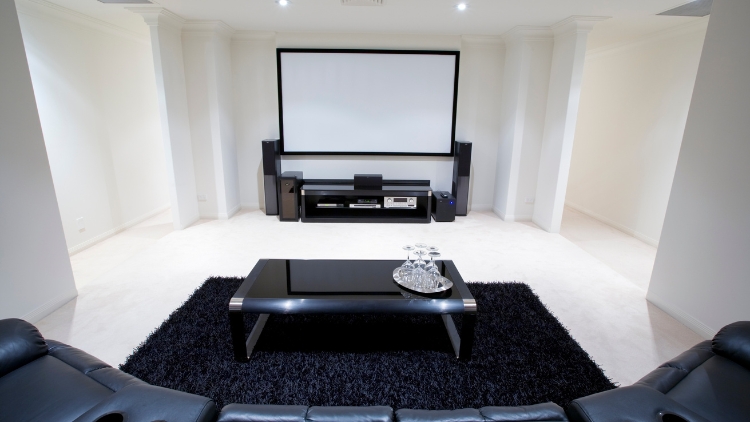
When you walk into a great media room, you can feel it: the quiet, the clarity, and the way every sound from the screen or speaker stays crisp and clean. But behind that perfect sound experience isn’t just fancy speakers or a new TV. It’s the right soundproofing and acoustic insulation working together to block noise, control echoes, and keep the rest of the house peaceful.
If you’ve ever turned up the volume and heard someone yell, “Turn it down!” from upstairs, you already know how important proper insulation and soundproof drywall can be. A well-built media room doesn’t just look great; it sounds incredible and keeps distractions out.
At Handyman Connection in Ottawa, we help homeowners design and install rooms that bring theatre-quality sound to life without shaking the rest of the house. In this article, you’ll learn how our professionals use acoustic insulation, soundproof drywall, and smart design features to make your media room one of the most comfortable spaces in your home.
You invest in your media room for entertainment, not for noise complaints. That’s where soundproofing becomes essential.
A proper setup does more than stop sound from escaping. It improves the quality of what you hear inside. You’ll notice clearer voices, stronger bass, and no more echo bouncing off the walls. Outside the room, conversations, phone calls, and sleep stay peaceful.
Without the right acoustic insulation, sound waves travel through walls, ceilings, and even floors. That means family members in other parts of the house can still hear your movie or game night. When you add the right materials, that sound stays contained — where it belongs.
Before installing anything, our team starts by assessing the structure. Every great media room build begins with a strong frame and isolation plan.
We focus on separating the room’s structure from the rest of the house. This is done through special framing techniques that reduce vibration and sound travel. The goal is to create what’s known as a “floating” wall — one that doesn’t transfer noise easily.
Key steps include:
Each step adds another layer of protection, ensuring sound stays trapped inside your media space.
Acoustic insulation is one of the biggest upgrades you can make in any media room. It absorbs sound energy, stopping vibrations before they travel.
We use dense, specialized insulation designed to reduce both airborne noise (like talking or music) and impact noise (like foot traffic or subwoofers). This material is placed between wall studs, in ceilings, and sometimes even under flooring.
Benefits of quality insulation include:
When installed correctly, insulation turns an ordinary room into a private, theatre-like space where you can enjoy movies, music, and gaming without disturbing anyone.
Once insulation is in place, it’s time to install soundproof drywall, a heavier, multi-layer material that stops noise in its tracks. It works by adding density and vibration control to your walls.
Our professionals at Handyman Connection carefully measure and cut each panel for a perfect fit. The goal is to cover every gap or joint that could allow sound to escape.
To improve performance, we often:
This combination of soundproofing layers and precise installation provides the quiet foundation every media room needs.
Sound doesn’t just move sideways; it travels up and down, too. That’s why ceiling and floor treatments are part of every media room build we complete.
For ceilings, we may add suspended panels or specialized insulation batts between joists to block overhead noise. For floors, adding underlayment or soft materials beneath carpet or tile helps absorb vibration.
Here’s how these upgrades help:
Each layer works together to stop unwanted noise and keep your space quiet and controlled.
Even the best soundproof drywall won’t work if sound leaks through gaps around doors. Our experts take extra time to make sure entry points are fully sealed.
We recommend:
These small changes make a huge difference. You’ll be amazed at how much quieter a room becomes once every seam and opening is sealed properly.
Once the room is built and sealed, it’s time to fine-tune the sound inside. This is where acoustic panels come in. These panels don’t just look good; they control reflections and echoes to balance your sound environment.
Panels can be placed strategically around the room to absorb sound waves and stop them from bouncing back at you. The result? Cleaner dialogue, smoother music, and a true theatre feel.
Popular acoustic upgrades include:
These details give your room that professional “studio” touch.
A media room build includes more than soundproofing — it also means organizing cables and connections for a clean, functional design.
Our team hides wires behind panels and connects everything to your sound system, TV, or projector with precision. Clean wiring not only looks great but also reduces electrical interference that can affect sound quality.
We can also integrate lighting controls and smart devices for full-room comfort and convenience. Everything works together seamlessly, so you can focus on the experience, not the setup.
Some homeowners choose to connect their media room to a heated entry floor or small mudroom to create a cozy transition space. This isn’t a requirement, but it adds comfort and keeps cold air from moving into your entertainment area.
Our professionals can install radiant heating under tile or stone to make your space more inviting year-round. It’s a simple addition that makes a big difference in warmth and style — especially during Ottawa’s colder months.
After installation, our team tests everything to make sure sound levels, airflow, and comfort are all balanced.
We:
Testing ensures that your room performs exactly how it should — quiet, clear, and comfortable.
When your soundproofing and acoustic insulation are installed correctly, you get more than just a quiet room. You get a better home experience.
Here’s what a well-built media room offers:
At Handyman Connection in Ottawa, we make sure every part of the process, from framing to sealing, is done right. That means lasting quality and a space your family will enjoy for years.
Bring Theatre Sound to Your Home
Great sound doesn’t happen by accident. It’s built with layers of quality acoustic insulation, soundproof drywall, and professional soundproofing techniques that keep your media room quiet and comfortable.
At Handyman Connection in Ottawa, we handle every detail — from planning your media room build to installing the materials that make it shine. Request an estimate today to learn more about turning your space into the perfect entertainment zone.
1550B Chatelain Ave
Ottawa, ON K1Z 8B5

© Handyman Connection 2026 | Privacy Policy
 613-723-5021