We offer a wide range of services for that fresh look, or just maintenance or updates to keep your home functioning and safe. Regardless of the size of the job, we have a craftsman that can tackle it. We offer a wide range of services for that fresh look, or just maintenance or updates to keep your home functioning and safe. Regardless of the size of the job, we have a craftsman that can tackle it.

Drywall / July 14, 2026

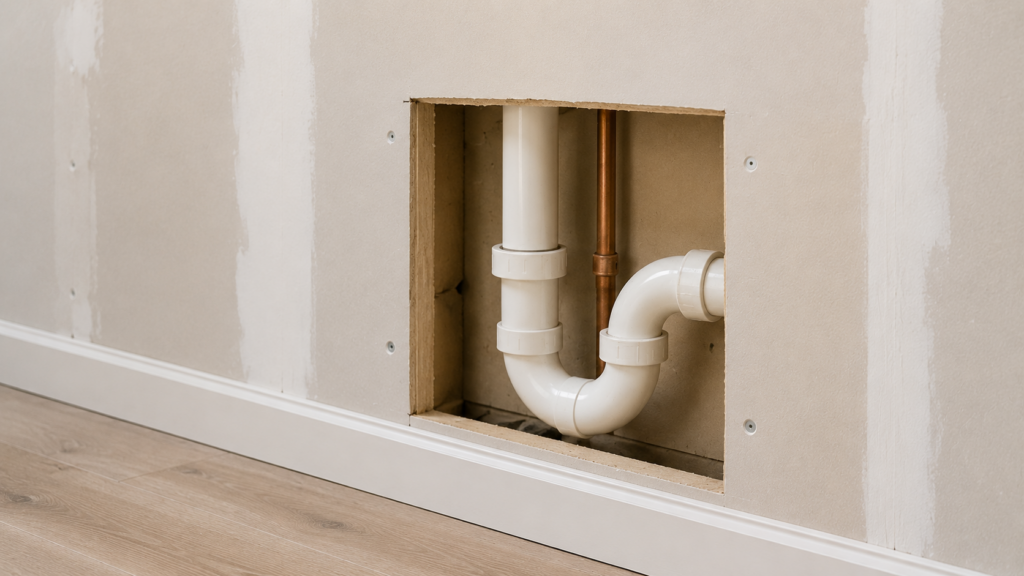
A professional fixes wall damage after renovations by cutting a clean square around the hole, installing a solid wood backing, attaching a new wallboard piece, and carefully applying tape and mud to blend the surface seamlessly. You often find yourself staring at jagged holes and exposed wires after plumbers or electricians finish their vital updates.
These open spaces protect your home’s new systems, but they leave your rooms looking messy and unfinished. We know how frustrating it is to see your newly updated space covered in dust and missing large sections of the wall.
You need a complete finish to truly enjoy your home updates. We step in to handle the messy work of closing up those gaps so you can focus on decorating and relaxing. Our experts use proven techniques to ensure the patched areas match the rest of your room perfectly. We take pride in delivering smooth, sturdy walls that hide all the hidden utility work behind them. In this blog, we will outline drywall repair after renovations with patch openings from plumbing and electrical work, so you know exactly what to expect from a professional finish.
Common drywall patching mistakes include applying too much joint compound at once, skipping the mesh or paper tape over the seams, and failing to sand the edges smoothly enough to blend with the existing wall. When people rush the process, the patched area often cracks, shrinks, or forms a visible bump under the paint. You want your walls to look perfectly flat, which requires patience and the right materials.
Another major mistake is ignoring the wall’s texture. Many homes have slight textures on the walls or ceilings, like orange peel or knockdown patterns. If a smooth patch is painted over a textured wall, it stands out like a sore thumb. Professionals always take the time to match the surrounding surface texture before picking up a paintbrush.
Finally, failing to secure backing for larger holes is a huge error. If a hole is larger than a doorknob, the new wallboard piece needs something to attach to. Without a wooden backing piece screwed behind the opening, the patch will eventually push inward the next time someone leans against the wall. We always build a solid foundation so your walls remain strong for years.
Our team focuses on specific steps to make your walls look flawless again. When completing drywall repair after renovations with patch openings from plumbing and electrical work, we address every detail carefully.
Closing gaps left behind by plumbing or electrical work takes care and accuracy. The opening must be measured properly so the new piece fits just right. A clean patch helps the wall stay strong and smooth over time. The following steps show how a proper patch is completed:
Large openings in drywall need extra support to stay secure. Rough edges must be cleaned up before any repair begins. A strong base helps the patch hold over time. The following steps show how large holes are repaired properly:
A patch will stand out if it does not match the wall’s texture. The existing finish must be studied closely before any work begins. Matching the texture helps the repair blend in completely. The following steps show how texture is matched:
The final steps bring the wall back to its original look. A smooth surface is important before any paint is applied. Proper finishing helps the repair last longer. The following steps show how the job is completed:
Our approach to fixing your walls is organized and highly effective. We believe in doing the job right the first time, so you never have to worry about crumbling patches or visible seams.
First, we complete a thorough assessment of the damage. Our professionals inspect the openings to determine the best technique for the specific size and location of the hole. We check for any remaining moisture from plumbing work and ensure the structural integrity of the wall is ready for the fix.
Next, we move into the preparation phase. We clean the area thoroughly and remove any loose paper or crumbling edges. Creating a clean, secure edge is vital for making the new patch sit flush against the old wall.
Finally, we execute the repair and finish. We use premium joint compounds and layer them thinly, feathering the edges outward so the bump disappears. Once it dries, we sand, texture, and paint the area. We leave your home spotless, so you can simply enjoy your newly renovated space without any leftover mess.
Vaughan experiences wild weather changes, from humid summers to freezing winters. These temperature swings cause the wood framing inside your house to expand and contract constantly. This natural movement puts extra stress on your walls, which is why a proper patch requires strong backing and flexible joint tape to prevent future cracking.
Many older homes in the Vaughan area also feature thick plaster walls instead of modern wallboard. Patching plaster requires a different approach to ensure the new materials bond correctly to the old lath. Our local experts understand the unique building styles in this region and adapt our techniques to suit the specific age and style of your property.
We also know the local building regulations. When working around newly updated plumbing and electrical systems, we ensure the wall closures meet all safety standards. We make sure that access panels are installed if the building code requires future access to certain shut-off valves or junction boxes.
The timeline depends heavily on the size of the holes and the drying time of the joint compound. Most standard patches take a couple of days because the mud needs to dry completely before we can sand and apply the next layer. We always prioritize quality, ensuring each layer sets properly for a lasting finish.
No, it will not look different when we finish. We specialize in feathering the joint compound and matching the exact texture of your current walls. Once the area is primed and painted, the patch becomes invisible.
Yes, we take cleanliness very seriously. Sanding creates a lot of fine dust, but we use protective drop cloths and clean the workspace thoroughly before we leave. You won’t have to spend hours vacuuming your floors after we finish the job.
Yes, we frequently fix ceiling holes left behind by new light fixture installations or roof leak repairs. Ceiling work requires special support to prevent the patch from sagging due to gravity. We use secure backing and matching ceiling textures to restore the surface safely.
If you have the original paint leftover from a recent room update, we can absolutely use it. If you do not have the exact paint, we can help identify the colour and finish to ensure the final coat matches your existing walls perfectly.
Your home should reflect the care and attention you’ve put into its upgrades. After investing in plumbing, electrical, or other renovations, it’s important to ensure the finishing touches are completed with the same level of care. Holes or unfinished walls can leave your space looking incomplete and diminish the impact of your improvements. That’s where we come in. At Handyman Connection in Vaughan, we specialize in restoring your walls to a flawless finish.
Our expert team has the experience and tools needed to handle every detail, from securely sealing openings to perfectly matching textures and paint. We take pride in making the process stress-free for you by managing the hard work, messy sanding, and precise finishing. When the job is done, you’ll have a space you’ll be proud to show off; a room that finally feels complete.
You deserve a home that’s not just functional but also beautiful. Don’t settle for anything less than perfection in your renovations. Choose Handyman Connection in Vaughan to ensure your walls look as polished as the upgrades you’ve invested in. Contact us today for an estimate and take the final step towards making your home exactly the way you envisioned it.

26-1950A HWY 7W
Vaughan, ON L4K 3P2

© Handyman Connection 2026 | Privacy Policy

 905-884-7678