We offer a wide range of services for that fresh look, or just maintenance or updates to keep your home functioning and safe. Regardless of the size of the job, we have a craftsman that can tackle it. We offer a wide range of services for that fresh look, or just maintenance or updates to keep your home functioning and safe. Regardless of the size of the job, we have a craftsman that can tackle it.
Painting / January 20, 2025
When you walk into a room, your walls should exude a clean, polished appearance. But there’s nothing more frustrating than seeing bubbles develop under that fresh coat of paint. It not only detracts from the overall look of your interior but also forces you to question, “Why is this happening in the first place?”
The truth is, there are specific reasons your paint job is bubbling, and understanding them can save you time, effort, and the expense of redoing the work. Bubble-free walls aren’t just about aesthetics; they’re about proper preparation and knowing how to avoid common pitfalls. Whether you’re experiencing this issue or are planning your next interior painting project, we’ve got you covered with expert insights and useful tips for preventing paint bubbling in the future.
Here’s a breakdown of some common causes of bubbling paint and how to address them before they ruin your walls.
One of the most overlooked causes is failing to clean your walls properly before painting. Dirt, grease, and dust act as barriers that stop the paint from adhering smoothly to the surface.
Imagine painting a greasy kitchen wall without scrubbing it down first. The paint clings to the grime, not the wall, and as it dries, bubbles start appearing. Even a fine layer of dust can weaken the paint bond.
To ensure a lasting paint job, make surface prep a priority. Use a degreasing solution for oily areas like kitchens and thoroughly wash all surfaces before painting. A few extra minutes of cleaning can save you from hours of frustration later.
Moisture is another big culprit. If you paint over damp walls, the water gets trapped under the paint. When the moisture tries to escape as the paint dries, it causes those unsightly bubbles to form.
This is especially common in high-humidity areas like bathrooms or basements. Even recent drywall repairs or a spill you’ve wiped away can leave moisture on the surface without you noticing.
Always make sure your walls are completely dry before painting. Using a fan or dehumidifier can speed up the drying process in moisture-prone areas. Proper dryness leads to smoother, longer-lasting results.
Choosing the right paint for your walls isn’t as simple as picking a colour you love. Different surfaces require specific paint types, and using the wrong one can lead to bubbling.
For instance, drywall often calls for water-based paints, while certain finishes might require oil-based products. If you mismatch paint to your surface, it struggles to adhere properly, making them more likely to appear.
Before starting your next project, do a little homework or consult with a professional. A paint that’s designed for your specific wall type will produce a more durable, smooth finish.
Painting over oil-based paint with a water-based option—or vice versa—is a recipe for bubbling. These two paint types don’t adhere to one another well, leading to separation and imperfections.
The good news is this issue is preventable. If you’re not sure what type of paint is currently on your walls, you can test it by rubbing a small painted area with rubbing alcohol. If it softens, it’s water-based. If not, it’s oil-based.
To avoid mishaps, stick to one type of paint or use a primer that allows compatibility between them.
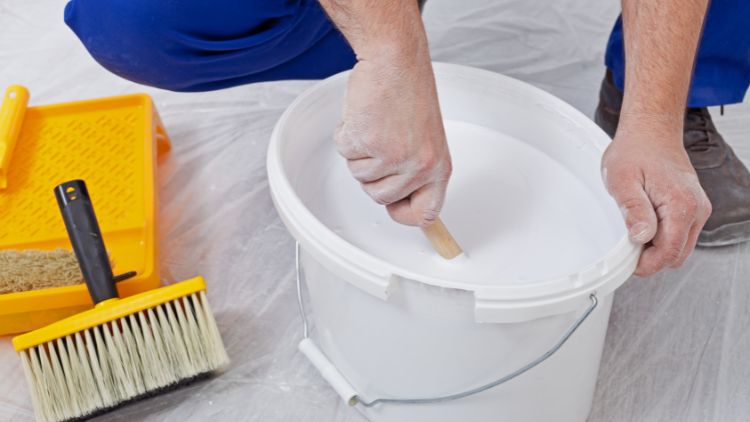
Believe it or not, how you stir your paint matters. Over-stirring or stirring too quickly introduces air bubbles into the paint, which can transfer to your walls.
These air bubbles expand and create visible imperfections as the paint dries. It’s a mistake many people don’t even realize they’re making.
To prevent this, stir your paint slowly and steadily. Many paints also come pre-mixed and don’t require vigorous stirring, so always check the manufacturer’s instructions.
Heat can wreak havoc on a paint job. When exposed to direct sunlight or placed near a heat source, paint can dry too quickly on the surface. This traps moisture beneath the top layer and eventually causes bubbling.
For example, painting a wall next to a sunny window on a hot day can result in an uneven finish. Similarly, heat from baseboard heaters or radiators can cause uneven drying.
The solution? Paint during cooler times of day and keep heating appliances turned off until the paint has dried completely.
Surfaces with peeling paint, flaky residue, or other contaminants prevent proper adhesion. If these underlying issues aren’t addressed, applying a fresh coat of paint won’t hide them—it’ll only make them worse.
Preparation is key. Remove old, flaking paint with a scraper or sandpaper. Cleaning the surface thoroughly ensures your new paint adheres directly to the wall and not to incorrect, unstable material.
Primer isn’t just an optional extra—it’s an essential component of a great paint job. Skipping primer leaves the wall with uneven textures or pores that don’t hold paint properly, which can cause bubbling.
Use a high-quality primer compatible with your paint type. It creates a smooth and stable foundation, allowing your chosen paint to perform its best.
Temperature and humidity can sabotage even the best paint job. Painting in high humidity or extremely cold temperatures slows drying time and introduces uneven finishes.
Check weather conditions before you start. Ideally, paint in a controlled indoor environment where humidity and temperature can remain consistent.
Freshly painted walls are delicate. Exposure to water, like steam from a shower or an accidental spill, can create bubbles before the paint has fully cured.
Protect your walls in the early stages of drying. Allow sufficient time for the paint to cure as per the manufacturer’s instructions before exposing it to moisture.
Bubbles can be annoying, but you can fix them and make your walls look nice again with the right steps. The way you fix them depends on whether they are small or big.
If they are small and only in a little spot, it’s not too hard to fix. First, gently sand down the bumpy area to make it smooth. Then, clean it well to get rid of dust or dirt. Once it’s clean and dry, repaint the spot with the same type of paint that matches the wall, so it will blend in nicely.
If the bubbles are bigger and cover more area, you’ll need to spend a bit more time fixing them. Start by scraping off the bubbly or loose paint until you get to a solid surface. Then, fix any damage underneath, like filling holes or smoothing rough spots. Once that’s done, put on a coat of primer to get it ready for painting. Finally, paint over it, and your wall should look as good as new.
Leave the painting to the professionals! At Handyman Connection, our skilled team specializes in fixing bubbling paint and delivering smooth, flawless walls. From selecting the perfect paint to meticulously prepping surfaces, we handle every detail so you can enjoy a stress-free experience.
By choosing us, you can sit back and relax while we transform your space into something beautiful. Don’t let unsightly bubbles ruin your home’s appearance—trust us for expert painting and repairs that leave your walls perfectly smooth and stunning.
Ready to learn more about our services or need some helpful tips? Request an estimate today! For the best interior painting in Silver Springs, count on us to get the job done right. Contact us now to explore how we can help with your painting and repair needs.
206 2915 21 St NE
Calgary, AB T2E 7T1

© Handyman Connection 2026 | Privacy Policy
 403-735-3257