We offer a wide range of services for that fresh look, or just maintenance or updates to keep your home functioning and safe. Regardless of the size of the job, we have a craftsman that can tackle it. We offer a wide range of services for that fresh look, or just maintenance or updates to keep your home functioning and safe. Regardless of the size of the job, we have a craftsman that can tackle it.
Maintenance & Installations / January 26, 2026
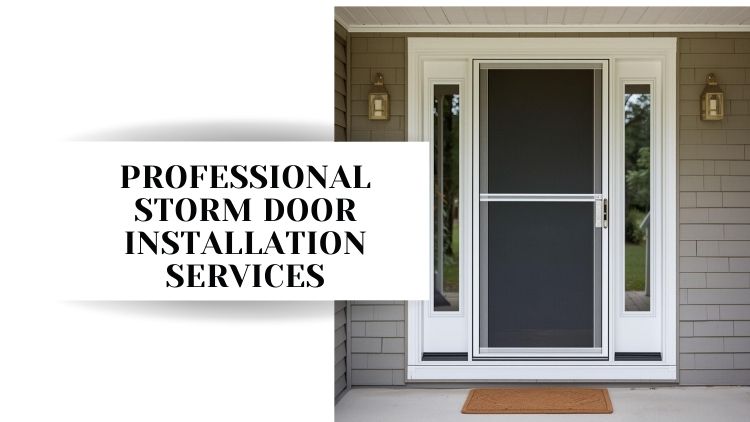
When you add a new storm door, you want it to open and close smoothly every single time. You also want the latch to line up perfectly, the closer to work without slamming, and the whole setup to feel strong and secure.
That’s why storm door installation with closer and latch alignment matters so much. When you use storm door installation services from a trained team, you get a door that fits well, seals tightly, and works the way it should every day.
You also avoid problems that show up when the closer or latch is even a little bit off. You may not notice these issues at first, but small gaps or misalignment can turn into sticking, slamming, or drafts.
When our professionals handle the job, every part is measured, adjusted, and tested for a smooth operation. You get the benefit of proper door closer and latch alignment and a professional storm setup that lasts. In this blog, you’ll learn how each part of the installation works, why alignment matters, and how a proper setup keeps your entry secure and easy to use.
Every smooth installation begins with careful planning. A storm door has to fit the opening properly before anything else can happen. Even a small measuring mistake can make the latch and closer hard to adjust later. That’s why we take extra time at the start.
We begin by checking the width, height, and shape of your doorway. Some openings are perfectly square. Others tilt slightly or have small gaps that need support. We look at everything before the new door goes up, because these details decide how well the storm door will seal and how smoothly it will move.
Here’s what we check during the planning stage:
Once this step is done, you already have a solid foundation for the rest of the setup. The door, closer, and latch all work better when they start with accurate measurements and good planning.
Once everything is measured, we start getting the doorway ready. This is the moment when the work shifts from planning to hands-on setup. You want a solid surface for the storm door to attach to, and that begins with preparing the opening the right way.
We make sure the surface is clean, flat, and ready for hardware. If parts of the opening are uneven, we correct them so the door will sit straight. A storm door only works well when the frame is level and the hinge points line up exactly where they should. We also mark the hinge side carefully. Even though many storm doors come with pre-set hinge spots, every home is a little different, so we line everything up to make sure it swings smoothly and stays balanced.
How about when the opening is fully prepped? Then we secure the hinge frame to the doorway. This step must be exact because even a small shift can cause bigger problems later, especially during closer and latch alignment. We use the right fasteners based on whether your home has wood, metal, or composite around the entry. When the hinge frame is set the right way, your storm door has the strong support it needs for everyday use.
With the hinge frame secured, we move into the heart of the job: attaching the storm door itself. This step requires steady hands and careful placement because the door has to hang evenly from the very beginning. A storm door that starts off level will close better, seal better, and allow the closer and latch to work the way they’re meant to.
We lift the door into position and line it up with the hinge rail, making sure it sits flush and straight. As we secure each hinge, we check the swing again and again. Opening and closing the door during this stage helps us confirm that nothing shifts and that it settles into the perfect spot before any of the remaining hardware goes on.
A level, balanced swing makes a big difference in how the whole door performs. It affects things like:
When this part is done right, everything that comes after: adjustments, seals, and final alignment, becomes much easier and far more precise.
Installing the Closer: Smooth Movement Every Time
A door closer is what makes your storm door feel solid and controlled. When it’s installed the right way, you get a door that opens gently, closes quietly, and never surprises you with a sudden slam. This part of the setup affects how it performs every single day.
We begin by mounting the closer bracket on the frame in the exact spot the door requires. Then we attach the closer tube to the storm door itself. The angle, spacing, and hardware placement all matter here because they affect how the arm moves when you pull the door open or let it swing shut. Even a small shift can change the entire motion, so this part is done with precision.
Once the closer is installed, we fine-tune the tension until the door moves the way it should. This is where you feel the difference between an average setup and a professional one. Good tension keeps the door from slamming, dragging, bouncing back, or stopping halfway. We make small, careful adjustments until the door glides smoothly, closes fully, and puts the right amount of pressure on the hinges. These changes may look tiny, but they make a huge impact on how long the closer, and the door, lasts.
Before we move on, we test the storm door over and over again. We open it slowly, we open it fast, we let it close on its own, and we guide it by hand. This helps us see how the closer reacts in real conditions. Weather changes can affect storm doors, especially in Canadian climates where temperatures shift quickly. A well-adjusted closer will continue working the same way through cold mornings, warm afternoons, and everything in between.
The latch is one of the most important parts of any storm door. You want it to connect cleanly every time you close the door, without sticking or bouncing back open. Even being off by a few millimetres can cause problems, so this step gets very close attention during the setup.
We start by attaching the latch hardware to the storm door itself. After that, we secure the strike plate to the frame. These two pieces must line up perfectly so the latch can slide into place without force. If the strike plate sits even a little too high or too low, the door will feel stiff, or the latch may not catch at all. That’s why we check the placement multiple times before tightening everything down.
Once the main hardware is in place, we fine-tune the alignment until the latch clicks in with almost no effort. This is where professional storm door setup makes a clear difference. When the alignment is correct, you get:
Latch alignment also affects how well the door seals. A latch that’s even slightly off can create small gaps that let in drafts, dust, or outdoor air. When everything lines up the way it should, the storm door sits snugly against the main entry door, helping keep your home comfortable and protected.
The last stage of the setup is where the door starts to feel complete. These pieces don’t just finish the look, they help the storm door perform well and seal tightly every time it closes.
Once all the hardware is in place, we test the storm door as a whole. This is where we make sure the hinges, latch, and closer all work together smoothly. We open and close it several times, checking that it moves without force, lines up naturally, and doesn’t rub against the frame. If anything feels tight, uneven, or slow, we make small adjustments right away. The goal is a storm door that feels easy to use and stays reliable every day.
When you want your door to swing smoothly, close softly, and stay aligned all year, you need storm door installation services that handle every detail. Proper door closer and latch alignment protects the frame, improves sealing, and keeps your home comfortable.
Our team at Handyman Connection in Calgary provides professional storm door setup built for long-lasting performance. Request an estimate to learn more about how we can help with your next project.
206 2915 21 St NE
Calgary, AB T2E 7T1

© Handyman Connection 2026 | Privacy Policy
 403-735-3257