When home repairs start piling up, it’s easy to feel overwhelmed. From small fixes to larger improvement projects, having a trusted professional makes all the difference. At Handyman Connection, our skilled craftsmen are here to handle everything from drywall repairs and painting to shelving installation and general home maintenance—so you can focus on what matters most.
Working with licensed, bonded, and insured professionals ensures your home is in capable hands. Our team takes pride in delivering high-quality workmanship, clear communication, and reliable service on every project. Whether you need help tackling a to-do list or completing a more detailed renovation, we provide solutions that are efficient, safe, and built to last.
Ready to get started? Skip the stress of DIY and let the experts take care of it. Request an estimate today and discover how easy it can be to bring your home projects to life with professional support you can trust.

Home Maintenance / December 19, 2016
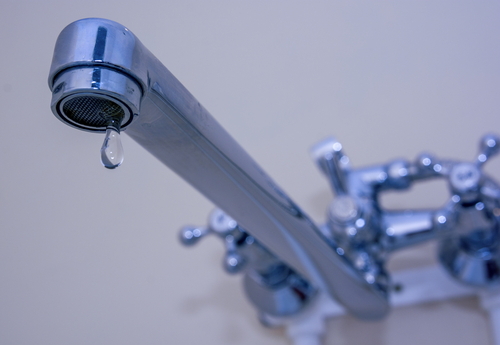
So it’s typically a bummer to notice a leaky faucet, but you should praise yourself for finding and identifying the leak before it becomes a much bigger issue either causing extensive water damage overtime or causing your water bill to rack up quickly. Our crew at Handyman Connection of Lexington has put together some tips and steps to help you fix that pesky leaky faucet the right way. Check them out, and good luck!
There are lots of varieties of faucets, so make sure to do some extra due diligence and research before beginning.
Turn the Water Off
A mistake made by many homeowners trying to fix their faucets, is not turning off the water before beginning to fix the problem. If you don’t turn off the water, you can create quite a mess and potentially make the problem worse for yourself. Don’t forget this step, and turn off the water supply just for the duration of fixing your problem.
Clear Out the Area
Take out any parts of the knobs that are not essential to the performance of the faucet. You can remove them with a screwdriver. This will help to keep your process simple, and uncluttered.
Loosen the Faucet Parts
Next, you’ll need to loosen up the parts including the packing nut and the stem. If you notice that your leak is happening around the handle, replacing the packing nut may solve your issue, so examine the nut and consider replacing it with a new one. Additionally, you’ll want to remove the stem of the faucet completely so that you can check for damage or debris.
Washers and O-Rings
If you aren’t noticing any damage or issues up to this point, you’ll need to check the O-ring and washers that are located inside of the valve. Go ahead and replace the washer since it’s inexpensive and you are already inside of the faucet. The O-ring could also have been damaged or is rusting, which could cause it to be loose around the stem of the faucet resulting in a leaky faucet. Go ahead and replace the O-ring as well while you are in there too. Make sure the washers and O-rings are the accurate size and fit, so that you don’t run into this problem again sooner than later.
Reassemble
After you’ve replaced the washers, O-rings, and possibly the packing nut, go ahead and carefully reassemble the faucet, and re-test for a leak by turning the water back on slowly. If you don’t notice your leak anymore, then congratulations, you’ve fixed your problem. If you do see the leak coming through, make sure that each part you’ve replaced is re-tightened and fits correctly.
If you still notice issues with your faucet, you may need professional assistance in identifying what the problem is. If that’s the case for you, be sure to give our experts here at Handyman Connection of Lexington a call. We’re always here to help with any and all of your home maintenance problems and projects, no matter how big or small they may be.
1585 Mercer Rd STE 120,
Lexington, KY 40511

© Handyman Connection 2026 | Privacy Policy
 (859) 276-1811