We offer a wide range of services for that fresh look, or just maintenance or updates to keep your home functioning and safe. Regardless of the size of the job, we have a craftsman that can tackle it. We offer a wide range of services for that fresh look, or just maintenance or updates to keep your home functioning and safe. Regardless of the size of the job, we have a craftsman that can tackle it.

Kitchen / April 21, 2026

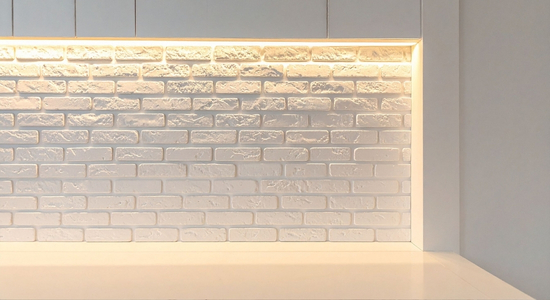
You can instantly upgrade your kitchen and bring new life to your space with a fresh backsplash. A sleek, professionally installed backsplash with clean cuts and sealed grout not only sharpens the overall look but also adds durability and easy maintenance to your kitchen. Whether you want a modern, minimalist design or something bold and artistic, the right backsplash transforms your space into a stylish, functional hub.
At Handyman Connection in Brantford, we know just how important those finishing details are to creating a polished kitchen. Clean cuts make every tile fit seamlessly, while expertly sealed grout ensures the final touch is both visually appealing and long-lasting. The secret lies in precision and attention to detail — qualities we bring to every project. When your backsplash is thoughtfully installed, your whole kitchen feels upgraded in an instant.
If you’re curious about what it takes to achieve a flawless backsplash, we’ve got you covered. From choosing the right materials to understanding what the installation process looks like, we’ll break it all down for you step by step. You’ll learn how we turn your vision into reality with craftsmanship you can count on.
Yes — kitchen backsplash grout should always be sealed. Grout is porous, which means it absorbs moisture, cooking grease, and stains easily. Without a sealer, your grout lines can become discoloured and difficult to clean over time.
Sealing grout creates a protective barrier that repels water and stains, keeping your backsplash looking fresh. Our team at Handyman Connection always applies a quality penetrating grout sealer after installation. We allow the grout to cure for at least 24 to 72 hours before sealing, then apply the sealer thoroughly and wipe off any excess within five minutes to prevent hazy residue. A second coat is often recommended for maximum protection. It’s a small step that makes a big difference in the long run.
Before any tile is installed, careful preparation makes all the difference. Skipping prep work can lead to loose tiles, uneven rows, or poor bonding. That’s why our team takes the time to get everything ready the right way. A strong start helps the whole project turn out better.
Our team starts by:
Starting from the centre of the wall and working outward is key. This creates a balanced, symmetrical look that makes the whole project look intentional and polished.
Clean cuts are what separate a professional backsplash from an amateur one. Ragged or chipped tile edges are hard to hide and immediately stand out. That’s why our craftsmen use the right cutting tool for every situation.
Here’s how we approach tile cuts:
Every measurement is taken twice and marked clearly before cutting. This reduces waste and ensures each piece fits exactly where it needs to go. The result? Crisp, clean lines that look sharp from every angle.
With the prep work done and tiles cut to size, it’s time to set them in place. Our team applies mastic or thin-set mortar using a notched trowel, working in small sections — roughly two square feet at a time — so the adhesive doesn’t dry before the tile is placed.
Each tile is pressed into the mortar with a slight twist to ensure good coverage and full contact. Tile spacers are used throughout to maintain consistent gaps between tiles, which makes grouting much easier and cleaner.
For outlets and switches, we install box extenders to bring them flush with the new tile surface. Once all the tiles are placed, we allow them to set for a full 24 hours before moving on to grouting. Rushing this step leads to tiles that shift, crack, or come loose and our team never cuts corners.
Once the tile has set, it’s time to grout. This step brings the whole look together, and doing it properly takes technique.
Our craftsmen follow a careful grouting process:
This final detail — using caulk instead of grout at transition points — is something many homeowners don’t know about. It’s a small but important step that prevents the grout from cracking over time as the surfaces expand and contract.
Sealing the grout is a key step in a professional backsplash installation. It is not something that should be skipped. Our team takes this step seriously to make sure your backsplash stays protected. Proper sealing helps prevent stains, moisture damage, and early wear.
First, we allow the grout to fully cure before sealing it. This usually takes between 24 and 72 hours. Once the grout is ready, we apply a penetrating sealer using a small brush or foam applicator. We make sure the grout lines are fully covered, then wipe away any extra sealer from the tile surface to prevent a cloudy film.
For the best protection, we apply a second coat of sealer. This adds an extra layer of defense against spills and moisture. Once sealed, your grout is better protected from everyday use. With simple cleaning and resealing every year or two, your backsplash can look great for many years.
Brantford homes go through all four Canadian seasons. Summers can be hot and humid, while winters are cold and dry. These big temperature changes can put stress on the materials inside your home, including tile and grout. Over time, this can lead to cracks or loose tiles if the job isn’t done properly.
Older homes in Brantford often have uneven walls or layers of old paint. Before new tile can be installed, these surfaces need to be prepared the right way. If the prep work is skipped, the tile may not bond well. Proper preparation helps the tile stay secure and look good for years.
Our team at Handyman Connection understands the types of homes found in Brantford, Paris, and St. George. We know how to prepare different wall surfaces and choose materials that can handle local weather changes. We also plan for expansion and contraction caused by temperature shifts. This local experience helps us deliver results that are strong, durable, and built to last.
Most backsplash installations take one to two days. The tile needs to set for 24 hours after installation before grouting, so the project is typically spread across two visits.
Ceramic and porcelain tiles are the most popular choices for backsplashes. They’re durable, easy to clean, and come in a wide range of sizes and styles. Glass and natural stone tiles are also options, though they require slightly different installation techniques.
A simple test is to sprinkle a few drops of water on the grout. If the water beads up, the seal is still intact. If the water soaks in, it’s time to reseal.
In some cases, yes. However, this depends on the condition of the existing tile and the wall behind it. Our team will assess the surface during a consultation and advise on the best approach.
Wipe it down regularly with a non-acidic cleaner. Avoid harsh scrubbing pads that can scratch the tile or wear down grout. Reseal the grout annually or as needed to keep the protective barrier intact.
Sanded grout is used for joints wider than 1/8 inch. It contains sand particles that add strength and prevent shrinkage. Unsanded grout is used for narrower joints and provides a smoother finish. Your tile installer will choose the right type based on your specific tile spacing.
Investing in a new backsplash is one of the simplest ways to give your kitchen a fresh, updated look. It’s an opportunity to express your style while enhancing your space’s functionality. However, the key to achieving that polished, professional finish lies in expert installation.
At Handyman Connection in Brantford, we understand that every detail matters. From ensuring tight, clean cuts to applying adhesives correctly and sealing grout lines thoroughly, our team is committed to delivering results that stand the test of time. A poorly installed backsplash can detract from the overall beauty of your kitchen, but with our help, you can count on a stunning and durable outcome.
Don’t settle for less when it comes to your home—reach out to Handyman Connection today and take the first step towards transforming your kitchen. Request a free estimate and discover how we turn every backsplash project into a true work of art.
Brantford, ON N3R 7X3
License # 24 132140 PCTR

© Handyman Connection 2026 | Privacy Policy

 519-752-7774