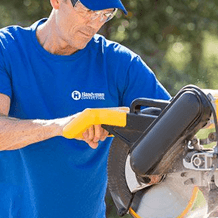
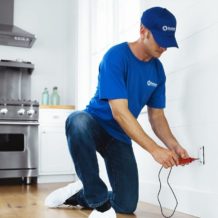
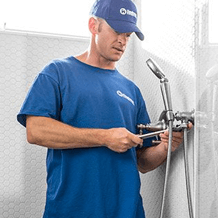
We are excited to announce that a long time Master Craftsman of our business is now the proud new owner; please join us in congratulating Earl Swader as the new owner of Handyman Connection of Blue Ash. Earl has previous business ownership already under his belt and is looking forward to continuing to serve the Blue Ash community as the proud owner.

Outdoors / July 23, 2026

A crisp edge is what separates a garden bed that looks cared for from one that looks like it’s creeping into the lawn. If you’ve re-cut a trench border every spring, you already know timber rots and plastic lifts.
Steel edging fixes both. It holds a clean line for years with almost no upkeep, and it bends into curves without the bulk of a sleeper.
Our landscaping guides keep telling you to add metal or stone edging for defined beds. Here’s the part they skip: which metal, which finish suits your garden, what the install actually takes, and where to buy it.
Timber edging looks great the day you install it and starts losing that look the same day. Pressed against damp soil, even treated pine softens and rots, and hardwood sleepers cup and split after a few seasons. Plastic has the opposite problem. It’s cheap and quick, but sun makes it brittle, and the first frost heave or mower bump pops it out of the ground.
Steel sidesteps both. A 1.6mm or 2mm steel strip is thin enough to bend into smooth curves and rigid enough to stay put once it’s pinned, so the line you set is the line you keep. It won’t rot or go brittle, and a mower wheel that would crack plastic just rolls over a steel top edge. The visible profile is far slimmer too, a few millimetres of edge instead of a chunky timber border, which is why steel reads as neater around a modern bed.
The trade-off is cost and effort up front. Steel runs more per length than a plastic roll, and cutting and pinning it takes longer than pressing plastic into a trench. For a small annual bed you plan to rework anyway, plastic is fine. For a permanent border you want to set once, steel earns the extra outlay.
Steel garden edging comes in two common finishes, and they age very differently. Corten (weathering) steel develops an even rust-coloured patina over its first months outdoors, and that oxide layer then shields the steel beneath it from further corrosion, which suits gardens going for a natural, earthy look. Brisbane landscape supplier Australian Landscape Supplies, which stocks the Straightcurve steel edging range in both finishes, makes the same point in its buying advice: the rust patina that forms on corten is protective rather than a defect, so the choice between the two comes down to the look you want, not durability. Galvanised steel keeps its silver-grey zinc coating instead, which reads cleaner and more contemporary against concrete and modern pavers.
A couple of practical notes before you pick. Corten stains anything porous it sits against while it’s weathering, so keep it clear of pale pavers and light concrete unless you’re happy with rust marks. Galvanised doesn’t bleed like that, which makes it the safer choice right beside a patio or a light-coloured path.
Then there’s flex. Straightcurve and similar systems sell the edging in a few profiles so it matches your layout. A straight run along a lawn or path wants a rigid profile that won’t wander. A kidney-shaped bed or a tree ring wants a flexible profile that curves without kinking. There’s usually a middle option as well, a firmer flex for gentle sweeps that still need to hold their shape.
Steel edging is genuinely DIY-friendly, and most runs go in with hand tools in an afternoon. The sequence is short.
Mark your line first with a garden hose or a length of rope, then cut a shallow trench along it, just deep enough to seat the edging at the height you want. Most people leave 10 to 20mm of steel proud of the soil so it holds mulch in without the mower scalping it.
Set the strip in the trench and drive the steel pegs through the pre-punched slots into the ground. Those pegs are what hold the line, so don’t skimp on them. On a curve, bend the strip gradually with your hands as you peg rather than forcing a kink in one spot. Where two lengths meet, join them with the connectors or corner pieces from the same system so you don’t leave a gap or a sharp end poking out.
Backfill both sides and firm the soil, then top up your mulch or turf. Corners, pegs, connectors and bracing come as matched accessories in most kits, so you’re not improvising fixings from the hardware aisle. If you want a reference before you start, the supplier stocking the range publishes its own step-by-step installation guide with peg spacing and joining detail.
Two safety notes worth the breath. Cut steel edges can be sharp before they’re seated, so wear gloves while you handle and pin them. And if you’re digging anywhere services might cross, call to have utilities located before you start.
For a border you want to set once and stop thinking about, steel is the material that keeps its shape while timber rots and plastic lifts. Choose corten if you want that weathered, rust-toned look and you’re keeping it away from pale paving. Choose galvanised for a clean silver line next to concrete and modern finishes. Either way, measure your run and match the profile to your curves before setting aside an afternoon.
Planning a bigger yard refresh, or want the edging put in as part of a larger landscaping job? Your local Handyman Connection can lend a hand.

11115 Kenwood Rd.
Blue Ash, OH 45242

© Handyman Connection 2026 | Privacy Policy

 (513) 771-3950