We are excited to announce that a long time Master Craftsman of our business is now the proud new owner; please join us in congratulating Earl Swader as the new owner of Handyman Connection of Blue Ash. Earl has previous business ownership already under his belt and is looking forward to continuing to serve the Blue Ash community as the proud owner.

Decks / September 20, 2024
Building a roof over a deck attached to your house can significantly enhance your outdoor living space. It not only provides shelter from the elements but also adds to the aesthetic and value of your property. This project requires careful planning, gathering the right materials, and understanding the structural requirements to ensure safety and durability.
According to the experts at Universal Roofing & Exteriors, the process begins with assessing the current deck structure and determining the type of roof that best suits your needs and location. This involves deciding between options like a gable, hip, or flat roof, each with its own advantages and considerations. Factors such as local building codes, the existing architecture of the house, and budget will also play crucial roles in the decision-making process.
Ensuring proper support and drainage is vital. The new roof must be securely anchored to the existing structure to withstand wind and snow loads. Incorporate gutters and downspouts to manage rainwater effectively, preventing potential damage to your home and deck. Following these guidelines will lead to a successful outcome that enhances both functionality and aesthetics.
Proper planning and preparation are crucial for building a roof over a deck. Key factors include understanding local building codes, selecting appropriate materials, and designing an effective roof layout.
Choosing the right materials depends on your climate, budget, and desired aesthetic. Common options for framing include pressure-treated wood, steel, and aluminum. Each has its benefits; for instance, pressure-treated wood is cost-effective and durable, while steel offers greater strength.
For roofing, options like asphalt shingles, metal roofing, and polycarbonate panels are popular. Asphalt shingles are budget-friendly but may need more maintenance. Metal roofing is durable and long-lasting but costs more upfront. Polycarbonate panels offer light transmission, reducing the need for artificial lighting.
Choose materials that meet local building codes for load-bearing capacity and fire resistance.
The design of the roof layout should complement existing structures and provide adequate protection. Start by measuring the deck’s dimensions accurately. This helps in drafting a precise design plan.
Consider the pitch and slope of the roof. A steeper pitch helps with water drainage and snow load, important for areas with heavy precipitation. Flat roofs require additional waterproofing measures.
Determine whether the roof will be freestanding or attached. An attached roof integrates into the house’s structural framework, requiring secure connections to prevent leaks or collapses. Freestanding designs may offer more flexibility but need robust supports.
Incorporate gutters, flashing, and drainage systems into the design to manage water runoff effectively.
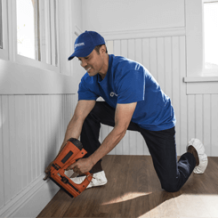
Building a roof over a deck attached to your house involves several key steps: setting up the foundation, installing the ledger board, attaching posts and beams, assembling the roof structure, applying roofing materials, and finishing touches, including waterproofing.
Begin by identifying the best location for the foundation posts. Mark spots where each post will be placed, ensuring they are evenly spaced and aligned with the deck’s outer edges. Dig holes for the posts, typically 12 inches in diameter and 24-36 inches deep.
Fill the holes with concrete and insert the post anchors before the concrete sets. Ensure the anchors are level and properly aligned. Allow the concrete to cure, which usually takes about 24-48 hours.
Use treated lumber for the posts to prevent rot and decay. Securely fasten each post in the anchor using bolts. Double-check for level and plumb alignment before proceeding.
The ledger board serves as the main support connected to the house. Select a treated lumber board, typically 2×6 or 2×8 in size. Measure and mark the height of the ledger board on the house’s exterior wall, aligning it with the deck structure.
Using a chalk line, create a straight guide for positioning the ledger board. Drill pilot holes through the board and house’s siding. Bolt the ledger board to the wall studs using lag screws, spacing them about 16 inches apart.
Seal around the board with silicone caulk to prevent water intrusion. Double-check to ensure the board is level and tightly secured to the house.
Position the vertical posts on the previously installed post anchors. Secure each post with bolts, ensuring they are straight and level. Use bracing to keep the posts stable during installation.
Attach horizontal beams at the top of the posts. Use metal brackets or hurricane ties for added strength. The beams should be at the same height as the ledger board.
Double-check all connections to make sure they are secure. This structure will support the weight of the roof, so it is crucial to ensure everything is properly aligned and fastened.
Create a framework using rafters or trusses. For rafters, use 2×6 or 2×8 lumber, depending on the span and weight load. Attach the rafters to the ledger board and horizontal beams using metal plates or brackets.
Space the rafters 16-24 inches apart for proper support. Ensure each rafter is straight and securely fastened. Use a temporary support beam if needed to maintain alignment.
For additional stability, add cross-bracing between the rafters. Install any necessary support posts underneath the deck if it is wide.
Start by laying down a waterproof membrane or roofing felt over the rafters. This layer prevents water from penetrating the deck area. Staple or nail the material in place, ensuring there are no gaps.
Next, install the roofing material—shingles, metal panels, or tiles. Begin at the bottom edge of the roof and work upward, overlapping each row to ensure water flows off properly.
Secure the roofing material with appropriate fasteners. Seal edges and joints with roofing cement to prevent leaks. Double-check for any exposed areas and cover them.
11115 Kenwood Rd.
Blue Ash, OH 45242

© Handyman Connection 2026 | Privacy Policy
 (513) 771-3950