We offer a variety of services for either that fresh new look, or for a small update or quick maintenance touchup. Regardless of the size of the job, we have a craftsman that can tackle it. During the an estimate appointments, our experts engage with the customers, walkthrough the project and exchange feedback.

Home Improvement / July 31, 2018
To make your kitchen look brighter, you can’t go wrong with under-cabinet lighting. Apart from the extra illumination, this type of lighting also has functional benefits because it adds a light source closer to the sink and food preparation areas. Installing under-cabinet lighting takes a bit of effort, but you can do it if you follow this basic step-by-step guide made by our renovation specialists.
1. Plan Your Project
Think of where you want your lighting to be placed. You can do this by laying out the lights directly under where you plan to put them. Ideally, you want lights to be no more than 13 inches apart. At least one of the lights should be within six feet of the nearest available outlet.
2. Mounting the Lights
Depending on the type of light you’re using, they may come with their own mounting template and hardware. Regardless of your choice, the lights must still be hidden from your line of sight. If the cabinets cannot conceal the lights, add a wood light rail a few inches wide to hide the mounted lights.
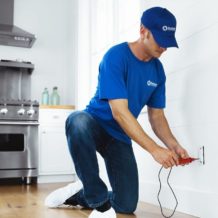
3. Connecting the Wiring
Attach wiring to connect all the lights together. Make sure you’re using just enough wiring that there’s nothing sagging beyond the cabinets or the light-guard rail you attached. You can use wire staples to hold the wires up and tucked away from view.
4. Adding the Plug
Connect a wire and switch to the light closest to the plug. Then, attach a plug to the other side of the switch. This will allow you to turn the lights on and off while not having to keep plugging and unplugging them from the outlet. Mount the switch to a spot in the wall where it is easy to access.
5. Finishing the Project
Secure the bulbs to the lights and see if the switch is working. If some of the lights are not working, remove the plug and check the wiring for that particular light. Keep checking until all lights are properly turning on and off at the flick of the switch.
If you’re looking for other great kitchen renovation ideas, don’t hesitate to ask us for help. Handyman Connection® is the number one source of kitchen remodeling services. Call us at (407) 270-2348 or fill out our online contact form to get an estimate.
1850 Lee Road, Suite 313
Winter Park, FL 32789
Certified Building Contractor 1262186

© Handyman Connection 2024 | Privacy Policy
 (407) 618-5550