When home repairs start piling up, it’s easy to feel overwhelmed. From small fixes to larger improvement projects, having a trusted professional makes all the difference. At Handyman Connection, our skilled craftsmen are here to handle everything from drywall repairs and painting to shelving installation and general home maintenance—so you can focus on what matters most.
Working with licensed, bonded, and insured professionals ensures your home is in capable hands. Our team takes pride in delivering high-quality workmanship, clear communication, and reliable service on every project. Whether you need help tackling a to-do list or completing a more detailed renovation, we provide solutions that are efficient, safe, and built to last.
Ready to get started? Skip the stress of DIY and let the experts take care of it. Request an estimate today and discover how easy it can be to bring your home projects to life with professional support you can trust.

Home Improvement / March 28, 2018
Repairing your leaking faucet yourself can be a daunting prospect. Once you learn the basics, however, repairing it becomes easy. In fact, the hardest part of fixing a leaky faucet is usually finding the right tools and replacement parts.
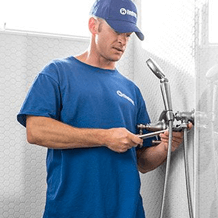
Here, we’ll show you how to repair leaks on faucets.
The Basics of All Faucet Repairs
Before you start, determine where the water is coming from. Understand that leaks around the base of the spout need a different repair than a drip from the end of the spout. You will then need to turn off the water supply to the faucet. Do this by closing the main water valve to your entire home. After you turn off the water, open the faucet in the center position to relieve water pressure. Finally, cover the sink drain holes with strainer baskets or rags. This is to avoid losing small parts down the drain.
Be aware of the order and orientation of parts as you remove them. You can make things easier by recording each step using a digital camera so you won’t get lost in the process. Set the parts aside in the order of removal for easier reassembling. Then, inspect the interior of the valve. Remove bits of deteriorated gaskets or mineral deposits. Use a cloth or fine nylon abrasive pad to clean the surface. Loosen mineral deposits by soaking them in soap and vinegar.
Plugged holes in the faucet body can result in slow water flow. Use a small screwdriver or a penknife to clean them out. Before reassembling the faucet, open the water shutoff valve a bit. This will flush out debris loosened during the cleaning and inspection.
After reassembling, open the faucet to the middle position. Open the shutoff valves to turn on the water. Wait for the free flow of water and all the air is out of the pipes. If the water flow through the faucet is slow, the aerator may have an obstruction. Unscrew the aerator and clean it out.
Take the Old Parts to the Store to Find Replacements
To find repair parts, you should refer to the brand usually stamped on the faucet. However, be sure to take the worn parts to the store with you. You may have to order parts that are not usually stocked in stores and home centers. Know the faucet’s model name or number when searching for a replacement part. Otherwise, take it with you to the store so you can match it to a photo in the parts catalog. Plumbing supply specialists are a good source of repair parts. If you’re having trouble finding parts, call the manufacturer of your faucet for help.
Handyman Connection® is your top source of DIY home repairs. Call us now at (407) 270-2348.
1850 Lee Rd Suite 313
Winter Park, FL 32789
Certified Building Contractor 1262186

© Handyman Connection 2026 | Privacy Policy
 407-618-5550