We offer a wide range of services for that fresh look, or just maintenance or updates to keep your home functioning and safe. Regardless of the size of the job, we have a craftsman that can tackle it. We offer a wide range of services for that fresh look, or just maintenance or updates to keep your home functioning and safe. Regardless of the size of the job, we have a craftsman that can tackle it.

Painting / April 12, 2026
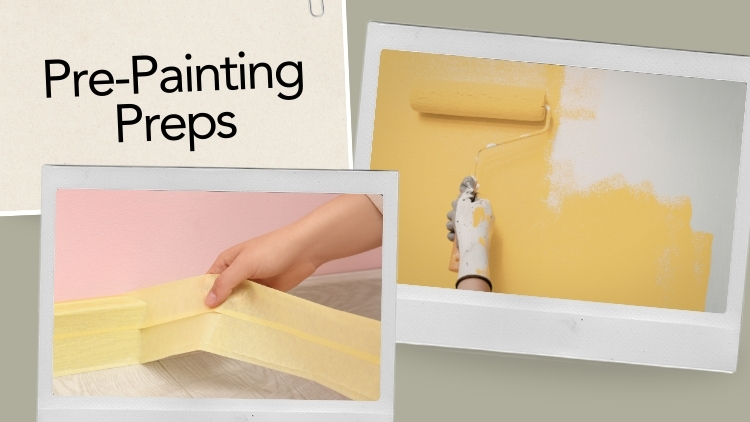
A fresh coat of paint can completely transform a room. But here’s what most people don’t realize: the paint itself is only half the job. The real secret to a long-lasting, smooth finish is what happens before the first stroke of colour ever hits the wall.
Professional painters spend 70–80% of their time on surface preparation. That means cleaning, repairing, sanding, priming, and protecting—all before paint is applied. Skip any of these steps, and you’re likely to end up with peeling, bubbling, or uneven coverage that won’t last.
You deserve results that look great and hold up over time. That starts with knowing what the preparation process actually involves. In this blog, we’ll walk you through exactly how our professionals ensure a flawless finish with pre-painting prep—and why trusting the experts at Handyman Connection in Victoria makes all the difference.
The smoothest finish comes from proper surface preparation—not the paint brand or colour you choose. A surface that is thoroughly cleaned, repaired, sanded, and primed will accept paint evenly and hold it for years. Without that foundation, even premium paint will look patchy, peel early, or show every imperfection underneath.
Our professional painters know this well. The quality of the prep work determines the quality of the final result. No amount of extra coats can fix a surface that wasn’t properly prepared from the start.
You might look at a wall and think it looks clean enough to paint. Our professionals know better. Dust, dirt, grease, and grime act as barriers between the surface and the paint, preventing proper adhesion. Even a thin film of residue can cause paint to peel or lift within months.
Here’s how our professionals handle the cleaning stage:
This step takes time, but it sets the foundation for everything that follows. Rushing past it is one of the most common reasons paint jobs fail prematurely.

Paint doesn’t hide surface flaws—it highlights them. Every crack, dent, and hole becomes more visible once paint is applied. That’s why our professionals address every imperfection before picking up a brush or roller.
The repair process typically involves:
Each repair is sanded smooth once it dries, blending seamlessly into the surrounding surface. Taking this extra time upfront prevents callbacks and costly re-dos later.
Sanding does more than make a surface feel smooth. It creates what professionals call “tooth,” which is a light texture that helps paint stick. Without this texture, paint may slide off glossy surfaces or fail to bond properly. Proper sanding helps the new paint hold firmly and last longer.
Walls are usually sanded with a pole sander using 100–150 grit sandpaper. This removes small bumps and scuffs the surface so the paint can grip better. Trim and detailed areas require finer sandpaper, usually in the 180–220 grit range, to create a smoother finish. Glossy surfaces are lightly scuffed to break the shine, since skipping this step often leads to peeling or chipping paint.
After sanding, all dust must be removed before painting begins. Our professionals use a vacuum and tack cloth to clean the surface thoroughly. Even small amounts of dust can stop paint from sticking properly. Careful sanding and cleaning help create the strong, smooth finish that our professional painting is known for.
Primer is not optional. Our professionals treat it as an essential part of the process, not an extra step that can be skipped to save time. Primer seals the surface, blocks stains, and ensures the paint absorbs evenly across the entire area.
Different situations call for different primers:
Without primer, paint colour can look uneven, coverage becomes inconsistent, and the overall durability of the finish drops significantly.
Clean, sharp paint lines do not happen by accident. Our professionals take time to protect surfaces that will not be painted. This step helps prevent spills, splatters, and messy edges. Careful masking also helps the final paint job look neat and professional.
Painter’s tape is placed along trim, corners, and any surfaces next to the area being painted. The tape is pressed down firmly so paint cannot slip underneath. Sometimes a putty knife is used to seal the edge tightly. This helps create the crisp lines you see in a professional paint job.
Floors and furniture are protected with heavy-duty canvas drop cloths. Canvas is safer than plastic because it absorbs paint drops and does not become slippery. Hardware, outlet covers, and fixtures are also removed or covered before painting begins. These simple steps keep the space clean and make the entire painting process smoother.
Before the first coat of paint goes on, our professionals assess the room conditions. Temperature, humidity, and lighting all affect how paint applies and dries. Getting these factors right is the final piece of preparation.
This final check prevents costly mistakes and ensures the surface is truly ready for paint.
Victoria’s unique coastal climate plays a big role in painting projects. The high humidity and frequent rain mean surfaces must be thoroughly dry before starting any work to ensure proper paint adhesion. Homes and buildings here often feature a mix of modern and heritage architectural styles, such as charming Victorian designs and sleek, contemporary builds. Each style comes with its own specific prep and paint requirements.
Local regulations also impact painting projects, especially when working on heritage properties. Special permissions may be needed, and specific materials or colors may be required to preserve the building’s historic character. Additionally, seasonal challenges, like heavy winter rains or the damp spring months, can limit when painting can be done effectively.
Common issues in the Victoria area include mildew growth due to moisture and fading paint from salt air exposure. Addressing these problems with specialized primers, mold-resistant paints, and weatherproof coatings helps ensure long-lasting results. By tailoring painting services to these local conditions, homeowners and businesses in Victoria can enjoy finishes that stand the test of time.
Professional painters typically spend 70–80% of their total project time on preparation alone. For a standard room, this can mean several hours of cleaning, repairing, sanding, and priming before any paint is applied. The time invested upfront is what ensures the final result looks smooth and lasts for years.
Paint-and-primer-in-one products can work well for minor touch-ups or repainting in the same colour. However, for surfaces with stains, bare drywall, fresh patches, or significant colour changes, a dedicated primer is still the better choice. It provides stronger adhesion and better stain-blocking than most combined products.
Victoria’s coastal climate brings higher humidity, especially in autumn and winter. Our professionals monitor moisture levels before starting any project, since painting in high humidity can cause paint to dry slowly, sag, or develop a blotchy finish. Ensuring proper ventilation and choosing the right paint formulation for the conditions is key to a durable result.
For most interior walls, a latex (water-based) paint in an eggshell or satin finish offers a good balance of durability and washability. High-traffic areas like hallways and kitchens benefit from semi-gloss. Flat finishes work well on ceilings but are harder to clean. Our professionals can recommend the right sheen and formulation based on the specific room and surface.
If the existing paint is stable, clean, and well-adhered, it can generally be painted over after proper cleaning and light sanding. However, if the paint is peeling, flaking, or bubbling, it must be removed down to a stable base first. Painting over unstable surfaces will cause the new paint to fail in the same areas.
Filler and joint compound typically need 24 hours to cure fully before sanding and priming. Rushing this step can cause the filler to crumble during sanding or create uneven spots once paint is applied. Primer should also be allowed to dry completely according to the manufacturer’s directions before the first coat of paint goes on.
A great paint job doesn’t happen by chance. It takes proper planning, the right materials, and skilled professionals who know the value of preparation. At Handyman Connection in Victoria, we take pride in ensuring every detail is handled with precision and care. Whether it’s cleaning the surface, fixing any damage, sanding for a smooth finish, applying primer to help the paint stick, or carefully masking areas to protect them, our team follows a proven process that sets us apart.
When you choose us, you can trust that your home is in expert hands. Our goal is to deliver a paint finish that enhances the look of your space and lasts for years. With our professional approach, you’ll see the difference that proper preparation makes. Don’t settle for less when it comes to your home.
Contact us today for an estimate and start the process of transforming your space with a flawless finish that you can enjoy for years to come. At Handyman Connection, we’re ready to help bring your vision to life with quality you can rely on.
598 Head St.
Victoria, BC V9A 5S7

© Handyman Connection 2026 | Privacy Policy
 250-384-4969