We offer a wide range of services for that fresh look, or just maintenance or updates to keep your home functioning and safe. Regardless of the size of the job, we have a craftsman that can tackle it. We offer a wide range of services for that fresh look, or just maintenance or updates to keep your home functioning and safe. Regardless of the size of the job, we have a craftsman that can tackle it.
Drywall / December 26, 2025

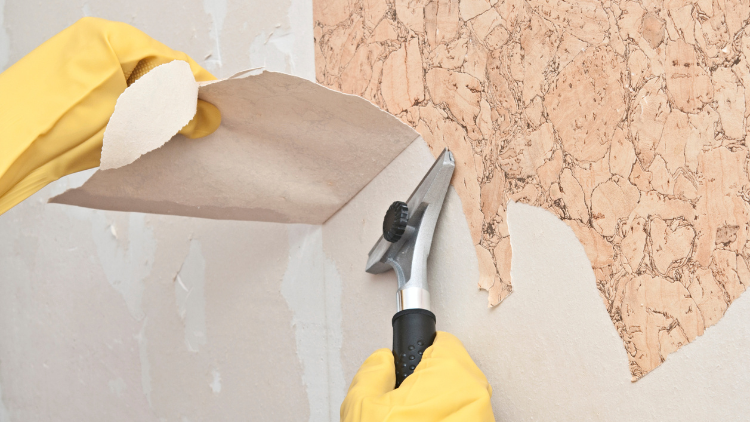
Refreshing the look of your Red Deer home starts with the walls. Whether you want to bring modern style or restore timeless character, wallpaper removal is often a crucial first step. If you’ve ever wondered how to remove old wallpaper without leaving residue or what it takes to achieve perfectly smooth, paint-ready walls, we’re here to guide you through every detail—ensuring you have the confidence to handle any wall update with a flawless finish.
Removing wallpaper isn’t just about peeling off paper; it’s about doing the job so well that you avoid hidden issues down the road. Our years of experience in providing wall repair and installation services have shown us that careful, residue-free wallpaper removal is the foundation of a beautiful renovation.
The method we use depends on the wallpaper and the wall beneath it. Over time, we’ve found that starting with the right tools and a methodical approach can make all the difference.
Here are some tried-and-true tools and techniques that consistently deliver:
For stubborn wallpaper, a solution of warm water and wallpaper remover (mixed according to product instructions) typically loosens adhesive without harsh chemicals. Allow the solution to sit and soak in—rushing this step can complicate the process.
It’s the hidden glue residue that can turn a quick project into a long-term headache. If not completely removed, this residue can cause unsightly bubbling, peeling, or paint failures once the new finish is applied. Our approach to wallpaper removal always includes a rigorous final clean using a damp sponge, rinsed several times, to wipe down all surfaces after removing the wallpaper.
We often follow these steps for a residue-free result:
This extra attention ensures your walls are ready for the next phase, preventing future headaches and guaranteeing smooth, lasting results. Letting walls dry fully is a safety step many overlook, but it’s essential for avoiding moisture-related paint issues.
Now that the old material is gone, it’s time to restore wall smoothness with professional finishing.
Sometimes, removing wallpaper reveals rough patches, gouges, or uneven seams. Achieving a flawless new look often means going beyond patching, moving into the world of skim coat and repair. Here in Red Deer, where seasonal changes and aging walls are common, the right preparation steps make all the difference.
Skim coating means spreading a thin, smooth coat of joint compound over your walls to level out imperfections. We follow a proven sequence to ensure every wall is paint-ready:
Many homeowners wonder if this process is necessary. In our experience, even the best wallpaper removal can leave behind slight texture differences or damaged surfaces—skim coating restores the perfect blank canvas for painting.
When dealing with tough jobs, our team is equipped to deliver solutions such as repairing tape seams and nail pops, matching or creating a range of wall textures, and installing new patches where wallpaper removal exposed deeper damage.
As we finish wall repairs, we’re preparing for the next leap: painting your Red Deer space to professional standards.
A premium-quality interior repaint service goes beyond colour choice—it relies on careful wall prep, expert technique, and high-quality materials. Our goal is always to leave every room vibrant, clean, and free of flaws.
We believe the difference shows in every detail, from preparation to final brushstroke. Here’s how we achieve polished results that keep our Red Deer clients coming back:
A well-primed and properly prepared wall is the secret to bright, long-lasting colour that never shows traces of old wallpaper or repairs underneath.
To ensure results that last, we always:
By keeping these basics in mind, repainting transforms your space instead of causing new headaches.
A beautiful paint job always starts with high-quality wall preparation. Through many projects, we’ve seen—especially in homes across Red Deer—that skipping the cleaning or repair steps leads to bubbling paint, cracks, and visible seams down the road. Taking the time for careful wallpaper removal, thorough cleaning, and a proper skim coat literally sets the stage for years of satisfaction with your interior repaint service.
Before every project, we walk clients through reviewing wall condition and historical repairs, outlining exact preparation steps required, and planning for texture or finish to match the rest of the home or office.
If your space features older surfaces, or you’ve experienced moisture issues in the past, we also offer solutions like framing repairs or additional insulation to ensure the surface is not just beautiful but resilient.
Let’s look at why our repair and painting services provide full-cycle support for every Red Deer project.
Our experience in Red Deer runs deep—not only do we know how to manage typical wall problems in homes around Barrett Park and commercial properties near Red Deer College, but we also stand behind our work every step of the way. Together, our team ensures that your project moves smoothly from wallpaper removal to perfect paint, old glue residue is never an issue after we’re done, skim coat drywall is available for the smoothest possible finish, and repairs blend seamlessly, even in older or well-loved homes.
As your trusted local partner, we focus on communication, honesty, and flawless craftsmanship for every wall transformation.
Ready to reveal your home’s best face to friends, family, or customers? Let Handyman Connection take care of the mess and the details—so you get to enjoy the results.
Refreshing your walls, whether through wallpaper removal or expert repainting, lays the groundwork for a transformed interior that radiates style and comfort. Meticulous attention to residue-free removal, seamless repairs, and premium painting is what truly sets apart a long-lasting, beautiful result. Taking the extra steps to clean, repair, and prime every wall in your Red Deer home or business can become a flawless canvas ready to showcase your vision.
Don’t let hidden glue, rough patches, or outdated finishes stand in your way. Our skilled team brings years of local expertise and a full suite of drywall and painting services, ensuring each stage of the process is handled with care and precision. If you’re ready to reveal the true potential of your space, reach out to Handyman Connection today—your walls will thank you.
PO Box 1099
Red Deer, AB T4N 6S5

© Handyman Connection 2026 | Privacy Policy
 403-314-2120