We offer a wide range of services for that fresh look, or just maintenance or updates to keep your home functioning and safe. Regardless of the size of the job, we have a craftsman that can tackle it. We offer a wide range of services for that fresh look, or just maintenance or updates to keep your home functioning and safe. Regardless of the size of the job, we have a craftsman that can tackle it.

Drywall / April 22, 2026
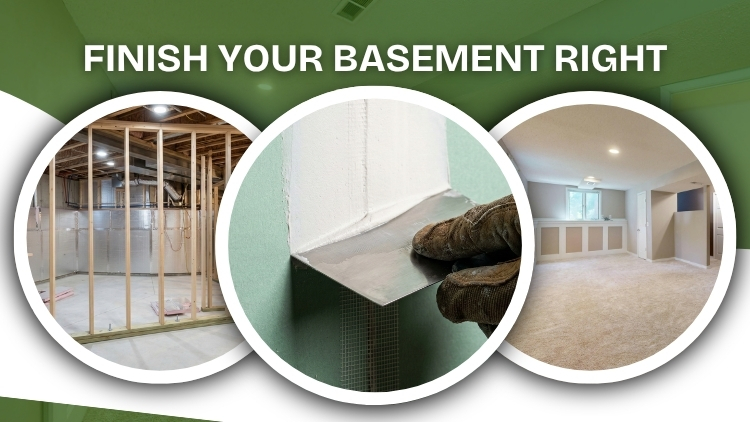
You’ve got square footage sitting right beneath your feet—and it’s not doing much. That unfinished space under your home has real potential. With the right framing and drywall installation, it can become a family room, home office, guest suite, or entertainment space that adds genuine value to your property.
Finishing a lower level the right way takes careful planning, the right materials, and skilled hands. From moisture control and structural framing to smooth drywall and proper electrical work, every step matters. Cut corners anywhere, and you risk uneven walls, moisture damage, or work that doesn’t meet Ontario’s building code.
That’s why homeowners across Halton turn to professionals for the job. In this blog, we’ll walk you through each step of finishing a lower level with proper framing and drywall installation—and explain exactly how the team at Handyman Connection in Halton approaches the work.
Yes—most unfinished lower levels can be converted into a comfortable living space. The key is making sure the area meets minimum ceiling height requirements, has proper moisture control in place, and is brought up to local building code standards before any framing or drywall work begins.
In Ontario, finished living spaces typically require a minimum ceiling height of 6 feet, 11 inches. You’ll also need to assess for moisture, plan your electrical and HVAC layout, and apply for the appropriate permits. When these fundamentals are handled correctly from the start, your lower level can become a fully functional part of your home.
Every successful finishing project starts with a solid plan. Before a single wall goes up, the space needs to be assessed for moisture, structural issues, and mechanical systems.
Key steps in the planning phase include:
Skipping this step leads to expensive problems later. Planning done right means fewer surprises once work is underway.
Framing creates the structural skeleton of your new living space. It defines where rooms begin and end, where doors and windows sit, and where all your mechanical systems will run.
Professional framers focus on:
Framing done well is invisible once the project is complete. Framing done poorly shows up in every wall, door, and corner for the life of the home.
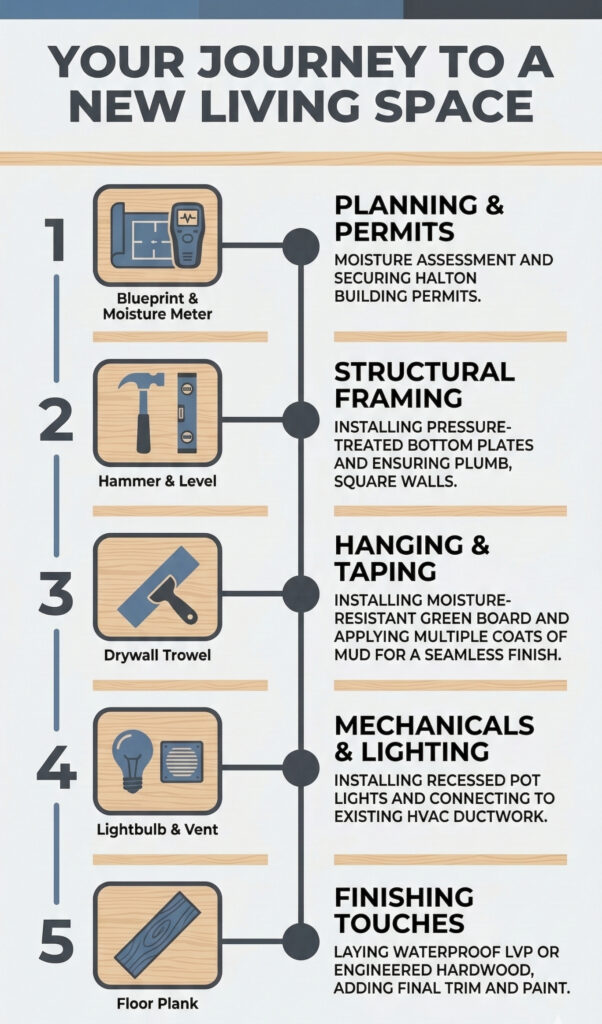
Once framing is complete, drywall installation gives your space its finished look. This step takes precision—gaps, uneven seams, or poor taping will show through any paint job.
The drywall process involves:
A smooth, well-finished drywall surface makes a real difference in how the finished space looks and feels. It’s one of those details that’s hard to fake and easy to notice when it’s done poorly.
A finished basement needs proper lighting, outlets, and climate control to feel like a real living space. Electrical and HVAC systems are installed during the framing stage and completed after drywall is up. Planning these systems early helps avoid problems later. It also ensures the space is safe, comfortable, and built to code.
Electrical work often includes pot lights or recessed lighting, which are great for basements with lower ceilings. These lights provide bright, even coverage without hanging down. Outlets are placed along each wall to meet building code and support everyday use. Dedicated circuits may also be added for home theatres, offices, or other equipment that draws more power.
For heating and cooling, most basements connect to the home’s existing ductwork. This helps keep the temperature consistent throughout the house. In some cases, a Heat Recovery Ventilator (HRV) is added to improve fresh air flow. All electrical work must be done by a licensed electrician and inspected before the walls are closed, ensuring everything is safe and properly installed.
The final phase brings everything together. Flooring is one of the most important choices in a below-grade space because moisture and temperature fluctuations are always a factor.
Popular flooring options for finished lower levels include:
Finishing details—baseboards, door casings, paint, and lighting fixtures—are what make the space feel complete. These elements tie the room together and elevate the overall quality of the finish.
Halton’s climate brings cold winters and variable humidity, both of which affect how a below-grade space performs. Insulation choices matter here. Rigid foam board applied to foundation walls is more effective than batt insulation in Canadian climates because it reduces thermal bridging and keeps moisture from accumulating behind the wall assembly.
Local building codes in Halton, including those in Burlington, Oakville, and Milton, require permits for finishing work that includes new walls, electrical, or plumbing. Working with a professional ensures the project is inspected and approved at each required stage—protecting your investment and your home’s resale value.
Homes in the Halton region also vary widely in age and construction style, from heritage properties in older Burlington neighbourhoods to newer builds in Milton. Each comes with its own set of structural considerations. An experienced professional will assess what’s needed before any work begins.
The timeline varies based on size and scope, but most projects take between four and eight weeks from start to finish. Larger spaces or those requiring significant plumbing work may take longer.
Yes. In most cases, a building permit is required for work that includes framing new walls, electrical, plumbing, or HVAC modifications. Pulling permits protects you legally and ensures the work is inspected and up to code.
Rigid foam board insulation applied directly to the foundation wall is the preferred method in Canadian climates. It manages moisture and reduces heat loss more effectively than fibreglass batt insulation in this application.
Start with a thorough moisture assessment before framing begins. Use pressure-treated lumber for bottom plates, moisture-resistant drywall where needed, and appropriate flooring for below-grade conditions. Proper ventilation—such as an HRV—also helps maintain healthy air quality.
Yes. According to the Canadian Home Builders’ Association, a finished lower level can add approximately 10 to 15 percent to a home’s resale value, while also increasing usable square footage.
Recessed pot lights are the most practical choice for low-ceiling spaces. They provide even, bright lighting without reducing headroom and can be positioned to highlight specific areas or create a layered lighting effect.
A finished lower level is one of the smartest investments you can make in your home. Whether you’re adding a cozy family room, a personalized workspace, or extra bedrooms, you’ll see the difference a well-done project makes. The key to a long-lasting lower level is quality craftsmanship. Proper framing ensures the structure is strong and reliable. Code-compliant electrical systems keep your home safe and functional. Smooth drywall provides a polished, professional look, and durable flooring stands up to daily wear and tear.
At Handyman Connection in Halton, we take pride in managing every detail of your project, from the initial plans to the final coat of paint. We service the Halton region, including Burlington, Oakville, Milton, and beyond, always striving to deliver top-quality results you can trust. Don’t leave your basement unfinished or your investment up to chance. Contact us today to request an estimate and create a space you’ll be proud of for years to come. Let’s bring your vision to life!
4145 North Service Rd., 2nd Floor Unit 258
Halton, ON L7L 4X6

© Handyman Connection 2026 | Privacy Policy
 905-297-5400